Plastering rough surfaces is an important stage in preparing the surface for tile installation. It is not just an aesthetic element, but also a practical step that ensures the durability and reliability of the final covering. This process includes several key principles that should be considered during the work. 🏗️
First of all, it is extremely important to consider the moisture of the walls. If the moisture is insufficient, the materials may not bond properly, while excessive moisture will lead to peeling of the plaster. It is recommended to check the moisture using special devices or conduct a simple test — apply a film to the surface for a few hours. If condensation collects under it, there are moisture issues.
Secondly, the temperature of the room also plays an important role in the plastering process. It is best to work at positive temperatures, ideally between +5°C and +30°C. At low temperatures, the plaster may freeze, while at high temperatures, it may dry too quickly, leading to cracks.
The third important issue is preparation of the base. The surface must be cleaned of old coverings, dirt, and grease. It is best to use a metal brush or special scrapers. For reliable adhesion of the plaster to the surface, it is recommended to use a primer that can create a “bridge” between the wall and the plaster layer.
Here are some recommendations for preparing rough surfaces:
- Protect furniture and floors — try to avoid contamination during the work process.
- Visually inspect the surface — the presence of cracks or defects may require prior elimination.
- Ensure good lighting to avoid missing spots during work.
Do not forget that the quality of materials also affects the final result. The choice of plaster plays a key role in the durability and appearance of the finished surface. Budget options may turn out to be less reliable, so it is always worth investing in quality materials, especially when it comes to areas with increased moisture requirements, such as bathrooms or kitchens. 🚿
Without proper preparation and adherence to all recommendations, even the most suitable plaster may prove ineffective. Therefore, it is important to approach this task responsibly!
Thus, the main principles of plastering rough surfaces include monitoring moisture, temperature, and careful preparation of the base. With new knowledge about the importance of preparation, you are ready to move on to the next stages of this exciting process! 🛠️
Choosing Materials for Plastering
When choosing materials for plastering, there are many aspects to consider to ensure the quality and durability of your work. First of all, you need to determine what conditions will be in the room where the plastering will take place. For example, in humid areas such as kitchens and bathrooms, it is better to use water-repellent or hydrophobic plaster mixtures. 🌧️
There are several main types of plaster that can be used:
| Type of Plaster | Main Characteristics | Application |
|---|---|---|
| Cement Plaster | Strong, moisture-resistant, frost-resistant. | External walls, areas with high humidity. |
| Gypsum Plaster | Light, retains heat well, dries quickly. | Internal walls, areas with low humidity. |
| Silicone Plaster | Water-repellent, breathable, resistant to fungi and mold. | Bathroom walls, kitchens, building facades. |
| Mineral Plaster | Eco-friendly, vapor-permeable, fire-resistant. | External walls, green buildings. |
Considering these characteristics, it is important to choose the plaster correctly depending on the future operating conditions. For example, cement plaster is the best choice for external walls, as it withstands sharp changes in weather conditions. While gypsum plaster is suitable for internal spaces where there will be no contact with water. 🏠
But not only the type of plaster matters; it is also important to pay attention to the composite materials from which it is made. For example, the composition of cement plaster should include quality cement and sand aggregates. Poor-quality components can deteriorate the physical properties of the finished mixture, leading to problems in the future.
There is another important aspect that cannot be ignored — practicality characteristics. Many manufacturers offer additional achievements — these can be special additives to improve adhesion, making application easier and reducing the risk of cracks. Along with this, it is also important to find one of the main criteria — cost. Often, budget and expensive options can differ significantly in quality, so it is worth choosing wisely. 💰
Always remember to pay attention to reviews about materials, as well as recommendations from professionals, as they can provide invaluable information about the effectiveness of specific products. It is also worth considering that some manufacturers provide quality certificates for their materials, ensuring their reliability and safety.
A clear understanding of typical plaster and its application will not only save your efforts but also help avoid unwanted mistakes during the renovation process.
Preparing the Surface Before Plastering
Before starting the application of plaster, it is important to carry out thorough surface preparation. This will not only ensure better adhesion but also prevent potential problems in the future. Before starting, let’s consider a few key stages of this process. 🧱
The first step is assessing the condition of the base. Check for cracks, dents, or other defects on the surface that may affect the final result. If you find such defects, they should be addressed before starting the plaster application. Small cracks can be filled with special mixtures, while larger damages may require more serious repairs.
The next step is cleaning the surface. Use a metal brush or a brush with stiff bristles to remove old plaster residues, dirt, grease, or other contaminants. The presence of dirt on the walls can lead to poor adhesion of the new plaster to the base. It is also advisable to treat the surface with water to wash away fine dust particles. 🌊
After cleaning, it is important to dry the base. If you are working in humid conditions, you must first dry the areas you plan to treat. Using heaters can be a great solution if the room is cold and damp.
Do not forget about priming. It plays an important role in ensuring better adhesion between the wall structure and the plaster. Primers can be of various types — acrylic, mineral, or silicone. Choose the option that best suits your plaster and operating conditions. 👷♂️
Here are some useful tips to help you in the preparation process:
- When cleaning the surface, be careful with delicate materials that may be fragile.
- Ensure proper ventilation in the room during preparation to avoid moisture accumulation.
- When applying primer, follow the manufacturer’s recommendations, as some require specific drying conditions.
Once you have completed all the preparation stages, you can confidently move on to the next stage — applying the plaster. Proper preparation ensures that your plaster will lay evenly and last long, as well as enhance the aesthetic qualities of your renovation. Attention to detail at this stage will help avoid unnecessary problems and costs in the future — let’s get started! 🎉
Plaster Application Technique
Applying plaster is an art that requires adherence to certain techniques to achieve the desired result. Let’s look at the key stages and methods that will help you perform this task correctly. 🖌️
Before you begin, prepare all the necessary tools. You will need:
- Spatula (usually made of stainless steel or plastic) for even application of the mixture.
- Mixer for thorough mixing of the plaster mixture.
- Level for checking horizontal and vertical alignment.
- Trowel for finishing edges and details.
- Bucket for mixing materials.
Before starting the procedure, it is important to let the plaster mix well and stand, so that all components are evenly distributed. It is recommended to use an electric mixer to avoid lumps in the mixture.
Now let’s consider how to apply the plaster:
- Starting the application: Using the spatula, take a small amount of plaster and spread it over the wall surface. The movements should be smooth and confident, starting from the bottom up. This will help avoid dripping of the mixture.
- Smoothing: After the initial application, let the plaster dry a bit (about 15-30 minutes), and then smooth it with a flat spatula. This is important for achieving a smooth surface.
- Thickness control: Ensure that you maintain a consistent layer thickness, usually between 5 and 10 mm. A layer that is too thick may crack during drying, while one that is too thin will not provide adequate strength.
- Second layer: If the work requires multiple layers, apply the second only after the first has completely dried. This may take from 24 to 48 hours depending on the conditions.
After completing the main application, it is time for the final finishing. Initially, when the plaster is still wet, you can perform mechanical treatment — pressing the surface with a float or wet sponge, which will give it the desired texture and prevent cracks. 🌟
Do not forget about ventilation of the room during work. This will optimize the drying process and reduce the likelihood of condensation on the walls.
By following the correct application technique, you can significantly improve the quality of your work and ensure the strength and durability of the plaster layer.
In conclusion, do not forget about personal safety: wear protective gloves and a mask while working with dust and materials to protect your respiratory system and skin. 👷♀️ Remember that your caution and attention to detail during plaster application are the keys to success in any construction project!
Recommended Types of Plaster
Choosing the right type of plaster is critically important for the successful completion of your project. Different types of plasters have their characteristics that determine their use depending on specific conditions. Here are some recommendations to help you make the right choice. 🔍
First, let’s consider cement plasters. They are known for their mechanical properties and moisture resistance, making them an excellent choice for outdoor work and areas with high humidity, such as bathrooms and kitchens. Their frost resistance allows them to be used in most regions of Ukraine, where the microclimate can be quite harsh.
Gypsum plasters, on the other hand, are ideal for indoor spaces. They are lightweight, have good thermal insulation, and dry quickly. This type is used somewhat less frequently in humid areas because moisture can deteriorate their structural characteristics. However, in dry and warm conditions, gypsum plaster looks attractive and durable.
Another interesting option is silicone plaster. Its main advantage is its moisture resistance and breathable properties. This makes it ideal for living spaces where condensation may occur. Silicone plaster also combats fungi and mold, which is an important aspect in humid environments. 🍃
Special attention should be paid to mineral plaster. It is a more eco-friendly option and has high vapor permeability, allowing walls to “breathe.” This type of plaster is ideal for outdoor work, as it has high resistance to atmospheric conditions.
To help you in making a decision, here is a comparative table of the main types of plaster:
| Type of Plaster | Main Characteristics | Application |
|---|---|---|
| Cement | Strong, moisture-resistant, frost-resistant. | External walls, areas with high humidity. |
| Gypsum | Light, thermal insulation, dries quickly. | Internal spaces not exposed to moisture. |
| Silicone | Water-repellent, resistant to fungi. | Bathrooms, kitchens, facades. |
| Mineral | Eco-friendly, vapor-permeable. | External walls, green buildings. |
When choosing, it is also important not to forget about additional characteristics. For example, many manufacturers offer various additives that can improve adhesion or provide additional elasticity, significantly reducing the risk of cracks in the future.
The financial aspect is also very important. Budget options may turn out to be cheap, but they usually do not meet quality standards. Therefore, in the interest of the durability of your work, it is advisable to know where you can save and where it is better not to skimp.
With the right choice of plaster, your project will achieve quality indicators that will satisfy both you and future owners of your home!
Leveling and Finishing the Surface
Leveling and finishing the surface after plaster application is an important final stage that affects the appearance and durability of your renovation. 💪 After the main layer of plaster has dried, it is time to move on to the aforementioned stages, which include leveling, sanding, and final finishing. This requires not only skill but also patience, as details play an important role in the overall impression.
Before starting the work, check the drying of the plaster again. If there are wet spots on the surface or if the material still feels soft, it is advisable to wait until it is completely dry. 🌤️ After that, you can proceed to leveling. Using rules (wooden or metal profiles) is quite effective for checking the evenness of the surface. If necessary, your spatula should become your best friend in eliminating small imperfections.
Typically, the leveling process includes the following stages:
- Checking evenness: At this stage, you will be able to determine if there are areas where the plaster is uneven and requires additional leveling.
- Applying the finishing layer: To achieve the maximum even surface, a finishing plaster may be required, which is applied in a thin layer. Traditionally, these can be gypsum compositions.
- Sanding: Using special sanding meshes or boards, you will ultimately achieve a perfectly smooth surface. ⚒️
Along with leveling, important procedural moments also include finishing the surface. At this stage, you decide which finish to choose. This can be:
- Paint: Creates a uniform color and is excellent for interior spaces, giving them an aesthetic appearance.
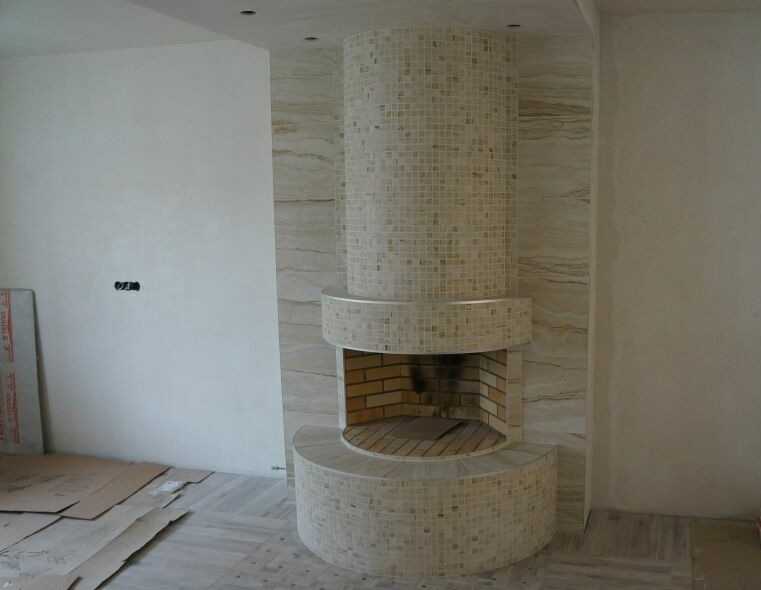
- Tiling: Ceramic tiles or porcelain stoneware are popular options for kitchens and bathrooms.
- Decorative plaster: It can add texture and uniqueness to your wall.
The key point is to ensure even application of the finishing material, as irregularities may be visible and affect the overall impression. If you plan to cover the surface with tiles, you should pay special attention to whether the base is even enough, as this will affect the final result of the tile installation.
At the same time, do not forget about the importance of ensuring proper ventilation of the room during the work, as this will help avoid moisture formation that can damage the finishing layer. 🌬️ Remember that quality leveling and finishing will not only provide a good appearance for your space but also extend the lifespan of both the plaster and subsequent coverings.
By following all the stages of leveling and finishing, you will achieve not only an aesthetically pleasing but also a reliable surface ready for further processing!
Using Tile Adhesive
When all preliminary work is completed and your plaster is ready for tile installation, it is important to consider the choice of the right tile adhesive. Unlike ordinary adhesive materials, tile adhesive has features that ensure reliable bonding between the tile and the prepared surface. Although you have already done a lot of work in preparation, leveling, and finishing, the longevity of your tiles will depend on the correctly selected adhesive. 🧩
There are several types of tile adhesive, including:
| Type of Adhesive | Main Characteristics | Application |
|---|---|---|
| Cement Adhesive | Resistant to mechanical loads, used in most cases. | Internal and external work. |
| Dispersion Adhesive | Easy to apply, suitable for lightweight tiles. | Internal cladding. |
| Epoxy Adhesive | Resistant to chemical actions, very strong. | Specialized premises, sinks, pools. |
| Tile Foam | Quick-drying, suitable for use on uneven surfaces. | Repairs requiring quick results. |
When choosing tile adhesive, it is important to consider the material of the tiles you are working with. For example, if you are using heavy ceramic or granite tiles, you will need a strong cement adhesive capable of withstanding the load. For lighter tiles, such as ceramics, a dispersion adhesive will suffice, which is easier to apply and has good adhesion. 🍃
Preparing the adhesive is another important aspect that cannot be ignored. Follow the manufacturer’s instructions, as this affects the properties of the adhesive. Usually, the adhesive needs to be mixed with water until a homogeneous mass is obtained, without lumps. It is important to let the adhesive sit for a few minutes before use — this will ensure better bonding characteristics.
The procedure for applying the adhesive to the surface also has its nuances:
- Distributing the adhesive: Use a notched trowel for even application of the adhesive. Apply the adhesive to a small area at a time so that it does not dry out.
- Laying the tiles: As soon as the adhesive is ready, immediately lay the tiles, gently pressing them onto the adhesive. Pay attention to the alignment of the tiles and maintain the spacing between them to ensure an even joint.
- Checking during installation: While working, constantly check the horizontal alignment of the tiles using a level, as even slight misalignment can affect the final appearance.
The correct choice and use of tile adhesive will ensure quality tile installation, which will directly affect the aesthetics and durability of your renovation. Be attentive at this stage! 🎯
Caring for the tile adhesive after application also has its importance. Before grouting the joints, make sure that the adhesive has completely dried — this may take from 24 to 48 hours, depending on the conditions. By following all the recommendations provided, you will increase the chances of successful tile installation, which will beautify your space for many years to come! 🌟
Caring for Plaster After Application
After completing the plaster application process, an important stage is proper care for it, as this determines not only the appearance of your work but also the longevity of the plaster. Caring for freshly applied plaster includes several important aspects that should be considered to achieve the perfect result. 🌈
First of all, remember about moisture. The first few days after applying the plaster, it is important to maintain a moderate level of humidity in the room. This is because rapid drying can lead to cracking. Therefore, it is recommended to humidify the air in the room using humidifiers or simply placing containers with water that will naturally evaporate. 💧
Next, you should monitor the temperature in the room. The ideal temperature for drying plaster is around +20°C. Avoid sharp temperature fluctuations, as this can negatively affect the quality of the layer. Do not turn on heaters or air conditioners at full power — moderate heating will ensure even drying.
Another important point is protection from mechanical impacts. Before the plaster is completely dry, avoid any physical impact on the surface. This includes avoiding pressure, impacts, or even touching. Installing protective elements, such as plastic or wooden shields, can also help protect the walls from accidental damage during repairs.
After the plaster has dried, it is important to check for cracks and defects, as even with proper care, minor damages may occur. If you find cracks, they should be filled using special repair mixtures or appropriate components that will ensure the continuity of the layer. 🛠️
Over time, after completing all the work, it is important to apply additional treatment. To improve the color and texture of the surface, it is recommended to apply finishing materials or decorative coatings. This will not only enhance aesthetics but also protect the plaster from external influences, thereby ensuring a longer lifespan.
In addition, after completing all stages, it is important to emphasize additional protection, for example, using special varnishes or water-repellent agents that are designed to protect the surface from moisture and dirt. Even if your plaster looks perfect, it can be vulnerable to wet conditions or other unforeseen factors if proper protection is not provided. 🔒
Remember that proper care for plaster after application is the key to a successful and long-lasting result. Humidification, temperature control, and careful handling of the surface are simple yet effective steps to achieve your goals! 💖
Thus, taking care of your new plaster is not only an investment in aesthetics but also an active protection for the prepared base, allowing you to enjoy the results of your work for many years. Do not forget all the tips, and your plaster will serve you faithfully! 🌟