Installing plywood on the floor is a process that requires careful selection of technology to achieve the best results. First, it is important to note that plywood, due to its structure, is a material that is characterized by high strength and ease of processing. It is excellent for creating a floor, as it can withstand significant loads and serve as the soul of the room for many years.
The technology of laying plywood includes several steps, each of which has its nuances. First, it is necessary to prepare the base on which the plywood will be laid. The base can be concrete, wooden, or another structure. It is important that the base is even, without cracks and damage.
Steps for installing plywood:
- Assessing the condition of the base and preparing it.
- Selecting the appropriate type of plywood according to the operating conditions.
- Cutting the plywood into sheets of the required size.
- Laying the plywood according to the chosen scheme.
- Securing the plywood sheets to the base.
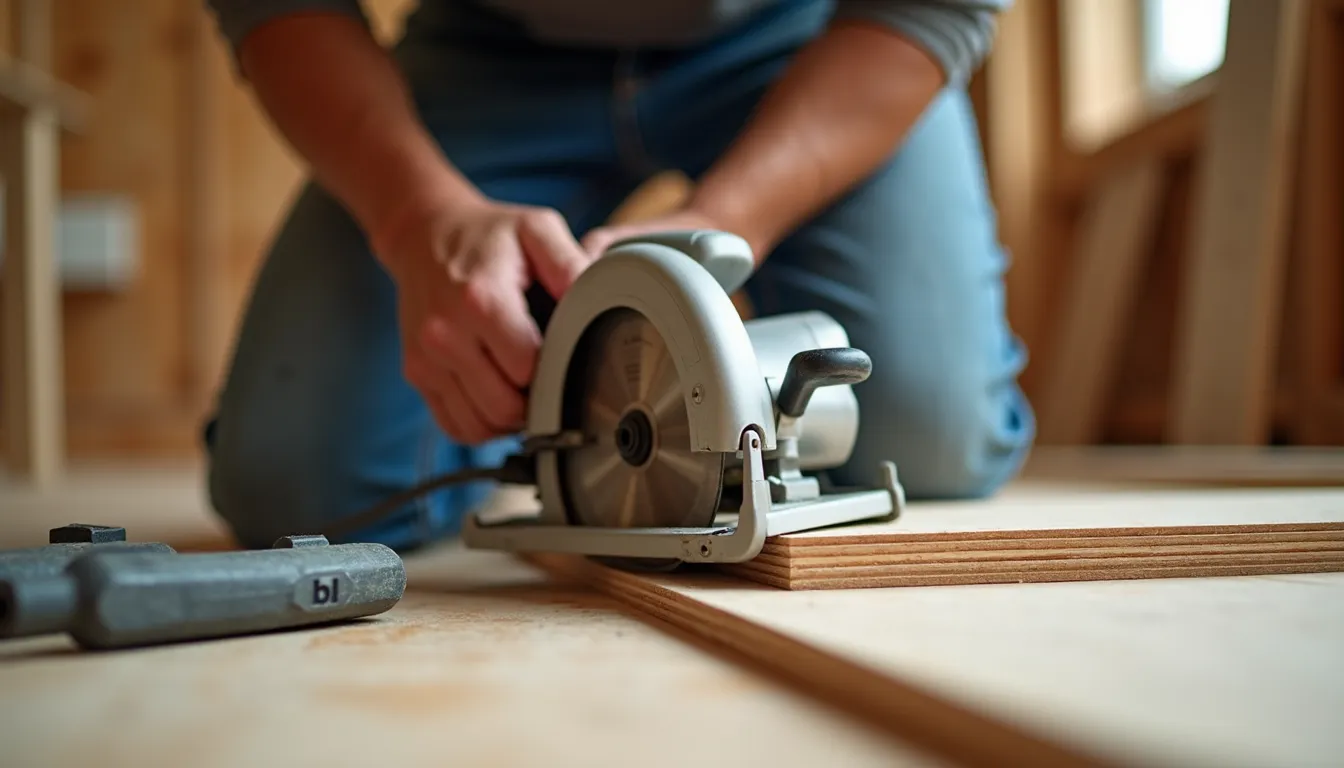
Before starting to lay the plywood, its sheets need to be prepared using special tools. To ensure proper quality of processing, a circular saw or electric jigsaw is usually used. Each sheet of plywood should have a thickness of at least 12 mm to provide the necessary rigidity to the floor.
“The quality of plywood installation directly affects the overall comfort of using the floor and its service life.”
After preparation, the sheets of plywood are laid in a checkerboard pattern, which helps reduce the likelihood of seams forming between the sheets. This is important, as improperly laid sheets can lead to deformations and squeaks in the future.
To secure the plywood to the floor, various methods can be used: from ordinary nails to screws, depending on the type of base. The use of glue is also a popular method that provides a reliable connection between the plywood sheets and the base, but it is important to consider the choice of glue, as not all of them are suitable for floor installation.
During the laying process, it is necessary to adhere to the technology and approach each stage carefully, as even minor mistakes can lead to serious problems in the future. It is also important to check the evenness of the laying using a level.
Due to its simplicity and effectiveness, plywood installation is becoming increasingly popular among builders. A proper approach to this process will not only ensure comfort in the room but also emphasize its style.
Choosing materials for the floor
Choosing materials for the floor is one of the most important stages in the plywood installation process. The variety of options on the market can initially be confusing, but knowledge of the specifications and properties of each material will allow for the right choice.
Different types of wood are used to make plywood, each with its own characteristics. The most common are sheets made from pine, birch, and ash. Each of these species has its advantages:
| Wood species | Advantages | Disadvantages |
|---|---|---|
| Pine | Affordable price, ease of processing | Lower strength than other species |
| Birch | High resistance to mechanical damage | Higher price |
| Ash | Aesthetic appearance, excellent strength | Quite high cost |
When choosing plywood, it is important to pay attention to its thickness. Depending on the expected load on the floor, it is recommended to use plywood with a thickness of at least 12-15 mm. The greater the load expected, the thicker the plywood should be chosen.
In addition, the degree of moisture resistance of the plywood is a critically important factor. If the floor will be laid in rooms with high humidity (for example, in kitchens or bathrooms), it is advisable to choose plywood with additional treatment that is resistant to moisture. Usually, this type of plywood is marked with the letter “F” in the labeling.
For the reliability and durability of the floor, it is important to:
- Choose plywood from reputable manufacturers.
- Check the quality certificates of the products.
- Consider the specifics of the room.
It is also important to pay attention to the treatment of the plywood – its finish will affect not only the appearance but also the wear resistance of the floor. Coating with varnish or oil will provide long-lasting protection and ease of care. The choice of finish should take into account not only aesthetic but also operational characteristics.
Equally important is the selection of underlayment. The right underlayment will help level the surface, provide sound insulation, and offer additional protection against moisture. Laying underlayment under the plywood can significantly improve the operational properties of the floor.
Thus, choosing materials for the floor is the key to the success of the entire plywood installation process. A clear understanding of the qualities of different materials and the right selection will ensure not only durability but also the aesthetic appearance of your floor for many years to come!
Preparing the base before laying
Preparing the base is a crucial stage in the process of installing plywood on the floor. Proper preparation will ensure the longevity and reliability of the flooring, as well as reduce the risk of problems such as squeaking or deformation. Before starting to lay the plywood, it is necessary to thoroughly assess the condition of the base and perform several important steps.
Assessing the condition of the base: Before laying the plywood, it is necessary to determine whether the base is level and stable. If you have a concrete base, it is worth checking for cracks, pits, or other defects. You can use a level or examine the surface manually. If the base is wooden, it is important to ensure that there is no rot or pests that could reduce the strength of the structure.
Leveling the base: If the base is not perfectly level, it is necessary to level it. There are several methods to level the floor:
- Using a self-leveling compound – this is the most effective method for concrete bases.
- Creating a wooden grid – suitable for wooden floors, but requires more time and effort.
- Laying drywall or plywood sheets – another method of leveling.
After the base has been leveled, it is important to check its moisture content. Excessive moisture can lead to deformation of the plywood in the future. It is recommended to use a moisture meter to check the moisture content of the concrete or wooden base. If it turns out that the moisture exceeds 12%, a waterproofing material should be used before laying the plywood.
Cleaning the base: Cleaning the base from debris, dust, oil products, and moisture is the next step. Using a vacuum cleaner, brushes, and a damp cloth will help prepare the surface for installation. It is important that the base is completely clean, as any residues can hinder effective adhesion and cause further problems.
Additional treatment: If the base is made of wood, consider treating it with antiseptic agents to prevent the development of mold or pests. It is also important to allow the base to dry after treatment, as excessive moisture can damage the plywood.
Laying insulation: If you plan to lay plywood in a room where the temperature may fluctuate (for example, on a balcony), you should take care of thermal and sound insulation. Special underlays made of synthetic materials can help in this regard, as well as reduce noise when walking.
Preparing the base is critically important for the successful installation of plywood. By putting effort into bringing the base to an ideal state, you will ensure the durability and aesthetics of your floor. Since a properly prepared base is the key to the stability of the plywood, pay maximum attention to each stage of preparation!
Tools and equipment for installation
For installing plywood on the floor, you will need specific tools and equipment that will help carry out this process efficiently and quickly. It is important to prepare everything necessary in advance to avoid unforeseen delays during work.
Main tools:
- Circular saw or electric jigsaw: These are the main tools for accurately cutting plywood. Using such tools allows for clean and even edges, which is important for further laying.
- Level: The level should be used to check whether the plywood is laid evenly on the base. This will help you avoid the formation of depressions and protrusions that can affect comfort when walking.
- Sandpaper: It will be needed to process the edges of the plywood after cutting to avoid splinters and ensure safe use.
- Measuring tape: For accurately measuring the area where the plywood will be laid, as well as for measuring the sheets themselves.
- Screwdriver or drill: These tools are necessary for securing the plywood to the base, especially if you plan to use screws.
Additional tools:
- Plywood glue: If plywood is to be laid with glue, it is important to choose quality glue, as poor quality can lead to deformation of the plywood during use.
- Rubber mallet: Used for tapping sheets without damaging their structure.
- Floor spacers: They will help ensure the correct gap between the plywood sheets, which is important for their natural expansion and contraction with changes in humidity.
Equipment: Do not forget to use protective equipment such as glasses and face mask when working with a saw or when processing materials that may emit dust or harmful substances.
Conducting the installation requires not only steady hands but also an experienced approach. The right choice of tools and equipment, as well as attention to detail, can significantly affect the final result. Using quality tools will simplify the process and ensure the durability of your flooring.
In conclusion, for successful plywood installation on the floor, it is worth preparing all the necessary equipment and tools. Using quality and reliable tools will not only simplify your process but also ensure an ideal result that you will first notice in your interior and appreciate during daily use of the floor.
Stages of laying plywood
The process of laying plywood is an important stage that affects the quality and durability of the floor. After preparing the materials and the base, we move on to the actual laying of the plywood, which requires clear organization and adherence to certain rules.
1. Placing the plywood sheets: Laying plywood begins with placing the sheets according to the chosen scheme. It is recommended to lay the plywood in a checkerboard pattern, as this will reduce the risk of cracks and increase the strength of the structure. The sheets should be laid with gaps of 2-5 mm between them to compensate for the thermal expansion of the material.
2. Securing the sheets: Plywood can be secured to the base in several ways. Usually, screws or nails are used, but in some cases, the use of special glue is also appropriate. Screws should be spaced 20-30 cm apart across the entire surface of the sheet, and for better adhesion, it is recommended to use screws with a wide head.
3. Conducting control checks: Each stage of laying should be accompanied by regular checks. After installing several sheets, it is important to check the evenness of the floor again using a level. If any unevenness is detected, it should be corrected to avoid deficiencies in the future.
4. Processing the joints: After laying all the sheets, special attention should be paid to the seams and joints. There are various methods for processing seams, and one of the most effective is filling them with special sealants or mastics that prevent moisture penetration and reduce the likelihood of cracks forming.
5. Final actions: After completing the laying of the plywood, it is important to let the material rest. This means that the newly formed floor should not be subjected to significant loads for several days. During this period, it is recommended to maintain the temperature and humidity in the room to provide optimal conditions for the glue to dry, if used.
The process of laying plywood is not too complicated, but it requires attentiveness and adherence to technology. Each stage, from placing the sheets to processing the joints, requires your attention and effort, which will later reflect in the comfort of your living space. Remember that well-laid plywood is not only an aesthetic appearance but also the foundation for the long service life of the floor.
Methods of securing plywood to the floor
Securing plywood to the base is a key stage of the installation, as it determines how reliably and stably the floor will hold in the future. The choice of the fastening method is influenced by various factors, including the type of base, operating conditions, and aesthetic requirements for the floor.
1. Using screws: One of the most common methods of securing plywood is fastening it with screws. It is important to use screws with a wide head, which provide better fixation. It is usually recommended to place screws 20-30 cm apart. First, secure the edges of the sheets, and then their center, ensuring even pressure.
When screwing in the screws, it is important to be careful not to split the plywood. For this, use a screwdriver or drill at low speed, which will also help avoid overheating the material. The precise positioning of the screws will extend the service life of the plywood, as it will reduce the likelihood of deformations.
2. Using nails: An alternative method of fastening is the use of nails. This method is usually less popular, as nails may not provide the same strength as screws. For a wooden base, nails may be more acceptable; however, their fastening in the plywood should be done very carefully to prevent damage to the material.
3. Adhesive bonding: Another common method is securing plywood with glue. This method provides a more uniform connection and reduces the risk of squeaks. When choosing glue, it is important to pay attention to its water resistance and degree of elasticity. For example, epoxy or polyurethane glues are excellent for such work, as they withstand significant loads and moisture exposure.
When using glue, it is important to follow the manufacturer’s instructions and ensure even coverage of glue on the surface of the plywood. This guarantees quality bonding and resistance to deformations.
4. Combined method: The most effective option may be a combined method that includes the use of both screws and glue. This approach provides maximum strength and stability of the structure. Usually, glue is applied first, after which the plywood is secured with screws. This is especially recommended for floors that are subjected to high loads.
5. Using underlayment: To further enhance adhesion, a special underlayment can be used. It also helps level the surface and provides sound insulation. If you plan to lay the floor in areas with increased humidity, the underlayment can serve as an additional barrier against moisture, extending the service life of your floor.
Securing plywood to the floor is not only a technical manipulation but also an important stage in achieving comfort and durability of your floor. The right choice of fastening method and adherence to installation technology guarantees that the floor will last long, maintaining its aesthetic appearance and functionality.
Processing seams and joints
Processing seams and joints is an important stage of plywood installation, as these areas can be the most vulnerable to moisture and mechanical impacts. Poor processing of seams can lead to deformations, squeaks, or even destruction of the floor. Therefore, careful and competent execution of this work will not only enhance the aesthetic appearance of the floor but also increase its durability.
Types of seam processing:
- Sealing seams: Using special sealants is one of the most effective ways to prevent moisture penetration. Sealants made from silicone or acrylic provide elasticity and water resistance. Carefully fill the seams so that the sealant gets into all gaps. If necessary, use a spatula for even distribution.
- Processing with mastics: Mastics that provide water-repellent properties can also be used to protect seams. They form a film that prevents moisture penetration, preventing deformation of the plywood.
- Installing decorative strips: To give the floor an aesthetic appearance and hide the seams, decorative strips can be used. They are available in various designs and colors, allowing you to choose the optimal option for your interior.
Processing process: First, it is important to clean the seams from dust and dirt. Use a damp cloth or vacuum cleaner to remove contaminants. After that, if you plan to use sealant or mastic, ensure that the surface is completely dry.
The next step is to apply the chosen material. For sealants, use a special glue gun to ensure even application. Do not forget to fill all cracks and seams. Leave a small margin to wipe away any excess that may appear during the process.
| Material | Advantages | Disadvantages |
|---|---|---|
| Sealant | Elasticity, water resistance | May look unaesthetic if applied incorrectly |
| Mastic | Moisture protection, ease of application | May require regular updating |
| Decorative strips | Aesthetics, hiding seams | Additional costs for materials |
Regular monitoring of the condition of the seams is also important. If you notice that the sealant begins to crack or peel, take immediate action to replace it. Good seam processing will ensure not only long-term operation but also comfort in using the floor, as well-processed seams will prevent dust and dirt from accumulating in the gaps.
Caring for processed seams: Regularly check the condition of the seams and joints. If necessary, update the sealant or mastic, and do not forget about basic floor care to prevent wear.
In general, processing seams and joints is not only a necessary procedure but also a great opportunity to add individuality and style to your floor. Well-thought-out processing and timely care will ensure a long service life for your plywood floor, as well as comfort in your home.
Final works and floor care
Final works after laying plywood on the floor play an important role in shaping the aesthetic appearance of the result and ensuring the durability of the flooring. After completing the plywood installation, it is necessary to perform a series of actions to make the floor not only beautiful but also functional.
1. Surface treatment: First of all, it is important to treat the surface of the plywood to make it more resistant to wear. It is usually recommended to use special varnishes or oils to protect the wood. Varnish gives the surface a shine and increases resistance to mechanical damage, while oils penetrate into the wood fibers, providing long-lasting protection. It is recommended to apply two to three layers of coating to maximize the effect.
2. Applying the finish coating: After treatment, you can proceed to apply the finish coating, which will highlight the texture of the plywood and give it a finished look. Pay attention to the choice of coating color – it should harmonize with other elements of the interior. Also, to maintain the appearance of the floor, it is extremely important to adhere to regular care, as quality materials guarantee durability.
3. Installing baseboards: Baseboards not only prevent dirt from accumulating in the gaps between the floor and the wall but also add aesthetics. The choice of baseboards directly depends on the style of the room. Modern baseboards can be made of wood, MDF, or plastic, allowing you to find the perfect option for your interior.
4. Floor care: From the moment the plywood is laid, it is important to ensure proper care for it. Regular cleaning from dirt and dust will extend the service life of the floor. Avoid using excessive moisture during cleaning, as this can lead to deformation of the plywood, so it is better to use a damp cloth or microfiber mop.
5. Monitoring humidity and temperature: To preserve the properties of the plywood, it is important to monitor the humidity in the room. Dry air can lead to cracks, while excessive humidity can lead to rot. The ideal humidity level in the room for plywood floors should be 40-60%. It is also advisable to avoid sharp temperature fluctuations to prevent deformation of the plywood.
Once you have ensured that all final works are completed, you can enjoy your new floor, which not only looks good but also serves for many years. Careful maintenance and attention to detail will help preserve the aesthetics and functionality of your plywood floor for a long time. Your new floor will become the calling card of your home, demonstrating attention to detail and approach to your living space.