Laying paving slabs is a complex process that requires a knowledge-based and practical approach. The true art lies not only in the aesthetic appearance but also in the functionality and durability of the laid surface. It is important to consider the fundamental principles that will allow you to achieve the best results.
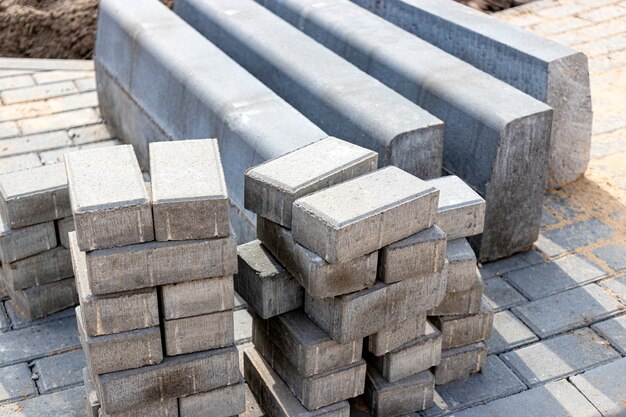
The first step to successful laying is the correct choice of materials. Using high-quality paving slabs that meet the operational requirements in specific conditions is the key to the longevity of the road surface. For example, the slabs can be made of concrete, stone, or even brick, each of which has its advantages and disadvantages.
| Material | Advantages | Disadvantages |
|---|---|---|
| Concrete | Weather resistance, low cost | Can crack under heavy loads |
| Stone | Aesthetics, durability | Higher cost, heavy during installation |
| Brick | Ease of installation, variety of colors | Lower resistance to mechanical loads |
The next important aspect is the preparation of the base. Without a quality base, no slab will last long. It needs to be leveled, compacted, and prepared for laying. This may involve using gravel, sand, or even old asphalt, depending on the specific conditions.
Adhering to the laying technology is just as important as preparing the base. It is important to lay the slabs in a certain sequence, ensuring uniform overlaps and correct distances between the slabs. The choice of joints and their width also play a significant role in ensuring drainage and preventing dirt accumulation.
It is also important to remember that different climatic conditions can significantly affect the choice of materials and laying technology. For example, in regions with frequent frosts, it is advisable to choose slabs that have high frost resistance.
In light of all this, it is very important to take care of safety during laying. Using appropriate tools, such as measuring tapes, levels, and hammers, helps avoid injuries and achieve the best results.
Remember that laying paving slabs is not just a covering for your area, but also an element that shapes your space. The correct selection of materials, adherence to laying technology, and attention to detail will ensure the aesthetic appearance and durability of your surface.
Choosing Materials for Paving Slabs
Choosing materials for laying paving slabs is a critically important stage that can determine not only the appearance of your space but also the durability of the road surface. Let’s consider the main types of slabs, their characteristics, and features that will help you make the right choice.
- Concrete Slabs: This is one of the most popular materials for laying paving slabs due to its availability and variety of shapes. Concrete slabs can be colored in different colors and even imitate natural stone. They are resistant to mechanical loads and withstand harsh operating conditions.
- Stone Slabs: Used to create aesthetic surfaces that blend well with the natural landscape. Depending on the type of stone, the slabs can be very durable, but their installation usually requires more time and effort due to their weight.
- Brick Slabs: The main advantage of brick slabs is their lightness and ease of installation. They are available in a variety of colors, allowing for interesting designs. However, it should be noted that brick slabs are less resistant to mechanical loads.
For a deeper understanding of this issue, let’s consider the main indicators of materials that should be taken into account when choosing slabs:
| Indicator | Concrete Slabs | Stone Slabs | Brick Slabs |
|---|---|---|---|
| Frost Resistance | High | High | Medium |
| Service Life | 10-30 years | 50+ years | 10-20 years |
| Cost | Low | High | Medium |
| Aesthetic Appearance | Medium | High | High |
The choice of materials should also be based on specific operating conditions. For example, in areas with high loads, such as parking lots, concrete slabs would be a better choice. In garden paths or park areas, stone or brick can be used, which add aesthetics and harmonize with nature.
Another important point is the ecological aspects. Among the latest technologies for producing slabs, environmentally friendly options made from recycled materials or without harmful additives are emerging. By choosing such materials, you will not only create a beautiful but also an environmentally safe road surface.
With a careful approach to selecting materials for laying slabs, you can be confident that your surface will serve for a long time, please the eye, and maintain its original appearance despite the changing times.
Types of Paving Slabs
Choosing the type of slab is an important step in the process of laying paving slabs, as the type of slab determines its operational characteristics, aesthetic appearance, and compliance with operating conditions. The market offers several main types of slabs, each with its own features.
- Rectangular Slabs: The most typical option used to create classic paths. The simplicity of formatting and the ability to combine with other shapes make it very popular.
- Square Slabs: Often used for decorating areas around buildings and in parks. They can create various patterns and interesting aesthetic solutions.
- Figured Slabs: These are slabs that have a non-standard shape, allowing for original design solutions. They are often used in decorative projects and landscape design.
When choosing slabs, it is important to pay attention to their composition, texture, and finish. The use of different materials affects the durability of the slabs, their resistance to mechanical impacts, and ultraviolet radiation. For example, slabs with a smooth surface may be less slip-resistant during rain, so it is advisable to use slabs with a textured surface in high-risk areas.
Here are the main factors to consider when choosing slabs:
| Factor | Importance |
|---|---|
| Wear Resistance | High |
| Water Permeability | Medium |
| Laying Methods | Medium |
| Aesthetic Qualities | High |
Coloring and Decorative Elements also play a significant role in choosing slabs. Many modern slab options are made using dyes that add uniqueness and a stylish appearance. This allows for easy combinations of different colors and shapes to create an aesthetic road surface. However, attention should be paid to the quality of the coloring, as low-quality dyes may fade over time under the influence of sunlight.
It is also important not to overlook the environmental benefits of modern materials. More and more manufacturers offer slabs made from recycled materials or within environmentally friendly technologies. Such surfaces not only look modern but also help reduce the negative impact on the environment.
Overall, the variety of paving slabs impresses with its diversity, allowing everyone to find the option that meets their needs and aesthetic taste. Remember that the material you choose will significantly affect the quality of the slab laying and its long-term operation.
Preparing the Base for Laying
Before starting the laying of paving slabs, special attention should be paid to preparing the base. Proper base preparation is a guarantee that your surface will last long while maintaining its aesthetic appearance and functionality.
Before starting, determine the type of base on which you plan to lay the slabs. This can be concrete, gravel, sand, or asphalt. Each of these materials has its own characteristics that should be considered.
- Concrete Base: An ideal option for areas with high loads. If your site will be subjected to significant traffic, concrete will provide maximum stability. Before laying, ensure that the concrete surface is dry and level.
- Gravel Base: Perfect for drainage and provides good stability. It is usually used in combination with a sand layer to improve adhesion. However, it is important to compact the gravel thoroughly to avoid settling.
- Sand Base: Used in combination with slabs that do not have significant weight. Sand allows for a soft yet stable foundation. In this case, it is especially important to control the moisture level, as overly moist sand can lead to slab deformation.
- Asphalt Base: Excellent for laying slabs in yard and street constructions. Asphalt provides good cushioning and prevents the base from expanding and contracting depending on temperature.
The next step is leveling and compacting the base. It is important that the surface is as level as possible and to ensure drainage to avoid water accumulation under the slabs. An improperly prepared base can lead to deformation and even destruction of the surface due to improperly distributed loads.
To level the base, we recommend following these steps:
- Excavate the necessary layer of soil, depending on the chosen base (concrete, gravel, sand, etc.).
- Level the bottom using a level.
- Layer the gravel or sand, again using a level for checking.
- Compact each layer using tamping equipment.
Remember: The quality of base preparation will affect the service life of the road surface. When laying the slabs, consider the nature of the traffic. For example, if you plan to lay slabs on paths, you can use fewer drainage elements than for a parking lot.
An optimal method will be to check the level of the base. For this, you can use a film or a “floating” mode. Incorrectly laid slabs can lead to operational problems in the future.
Words that are often overlooked when considering slab laying include “reliability,” “durability,” and “aesthetics.” By following all the preparation steps, you can be confident that your road surface will withstand the test of time and retain its original qualities.
Types of Bases for Paving Slabs
 Laying paving slabs on different bases requires a careful approach to choosing the type of base, as it is the key to the durability and reliability of the road surface. Bases for laying slabs can vary depending on the area where the installation is planned. Let’s consider the main types of bases on which paving slabs can be laid, as well as their characteristics and features.
- Concrete Base: This is one of the most common options for laying slabs, especially in areas with heavy traffic. A concrete base provides high stability and durability against loads and weather conditions. However, before laying, it is necessary to ensure that the base is level and free of cracks.
- Gravel Base: Gravel is a good option due to its permeability, which is especially important for preventing water accumulation under the slabs. When laying on gravel, it is important to compact the base to avoid settling. This works well for paths in summer houses or parks.
- Sand Base: Sand is often used in combination with gravel or on its own for laying lightweight slabs. However, it is important to monitor the moisture of the sand, as overly moist base can lead to slab deformation. This is a good option for creating a soft, natural look in the garden or on the property.
- Asphalt Base: Asphalt is popular due to its ability to flexibly respond to temperature and load changes. This reduces the risk of deformations and cracks in the slabs. Asphalt is often used in commercial areas or for parking lots.
| Type of Base | Advantages | Disadvantages |
|---|---|---|
| Concrete | High load resistance | Can crack with temperature changes |
| Gravel | Good drainage, easy to install | Can be unstable without compaction |
| Sand | Ease of installation, lightness | Can be dangerous in heavy rain conditions |
| Asphalt | Flexibility under loads | Can deform in hot weather |
The choice of base should be based on several factors, such as the type of load, the type of slab to be used, and the weather conditions in the region. For example, for areas with frequent rain or snowfall, it is advisable to choose bases that provide adequate drainage to avoid flooding the area.
When laying slabs on different types of bases, it is important to adhere to the laying technology and consider the specifics of each substrate. This way, your paving slabs will serve you reliably and for a long time, without losing their original appearance.
Laying on a Concrete Base
When laying slabs on a concrete base, it is important to adhere to several key aspects to ensure the reliability and durability of the road surface. A concrete base is often chosen for its high load resistance and weather conditions, but proper preparation and laying technology play a crucial role in the final result.
First of all, check the condition of the concrete base. It should be level, without cracks and peeling. If the base shows signs of deterioration, it is advisable to repair or even replace it before laying the paving slabs. Frozen moisture or grease contamination can impair the adhesion of the slabs to the base, so it is recommended to clean the surface using steaming or a powerful water jet.
After preparing the base, it is important to follow these steps for laying the slabs:
1. Waterproofing: If there is a risk of water accumulation under the slabs, it is advisable to use waterproof membranes that prevent moisture penetration. This is especially relevant in regions with frequent rain or snowfall.
2. Leveling the Surface: You can use special leveling compounds that begin the installation by connecting the slabs to the base. Leveling should be done considering the architectural features of your site.
3. Laying the Slabs: When laying the slabs, adhere to the recommended joint width, which usually does not exceed 5-10 mm. Use special plastic spacers to ensure even joints. Slabs should be laid diagonally or from left to right, depending on the chosen design.
4. Filling the Joints: After laying the slabs, it is advisable to fill the joints with a special compound or sand to improve the surface’s resistance to moisture and prevent weed growth. During rainy periods, this is especially important, as water can wash materials out of the joints, reducing the quality of the laying.
5. Compacting the Surface: Use special compacting equipment to optimize the contact area between the slabs and the base. This will provide better adhesion of the slabs, reducing the risk of cracks and destruction.
6. Monitoring Temperature: When laying slabs on a concrete base, it is important to consider the climatic conditions. Avoid laying slabs in excessively hot weather (over 30 degrees) or during rain, as this can lead to poor adhesion.
Don’t forget to care for the laid slabs. After completing the laying, it is recommended to actively moisten the joints and slabs for the first few weeks to ensure their proper hardening and improve adhesion to the base. Regular cleaning from dirt and debris will also help maintain the aesthetic appearance of the road surface.
| Laying Stage | Description |
|---|---|
| Waterproofing | Installing membranes that prevent water accumulation. |
| Leveling | Using compounds to create a perfectly level surface. |
| Laying the Slabs | Strict adherence to laying technology for better adhesion. |
| Filling the Joints | Using a compound or sand to compact the joints. |
| Compacting the Surface | Optimizing the adhesion of the slabs to the substrate. |
By adhering to these principles, you will be able to lay the slabs on a concrete base without problems, obtaining a reliable and beautiful road surface that will serve you for many years.
Laying on a Gravel Base
When laying slabs on a gravel base, it is important to adhere to certain technological nuances that will ensure the long-term operation and aesthetic appearance of the road surface. Gravel, as a base, has many advantages, including high drainage properties, which is especially important in changing weather conditions.
Before you start laying the slabs, you should prepare the base:
1. Choosing Gravel. Use medium or coarse gravel to ensure proper drainage and stability of the base. The larger the gravel, the better its drainage properties.
2. Preparing the Area. Clear the area of vegetation, debris, and the top layer of soil. Use shovels and rakes to level the surface.
3. Marking. Use stakes and string to define the area you plan to lay. Control marking will help you maintain straight lines and symmetry during laying.
4. Laying Gravel. Gravel should be laid in two to three layers, compacting each one thoroughly. This can be done using a mechanical tamper or manually.
The technology for laying slabs on a gravel base includes:
– Level Control. Use a level or laser level to check the horizontal alignment of the base. This will prevent the formation of puddles and maintain the aesthetic appearance of the surface.
– Laying the Slabs. Start laying from a corner or edge of the area. Monitor the distance between the slabs, which usually does not exceed 5-10 mm. It is important that the slabs fit tightly together, without gaps.
– Adjusting the Slabs. After laying, the slabs can be adjusted with a light tap of a rubber mallet to achieve perfect contact with the base.
Final Steps of Laying:
1. Filling the Joints. After laying, fill the joints with clean sand or special mixtures for joint filling. This will prevent water accumulation and deformation of the slabs.
2. Compacting the Surface. Re-compact the slabs using a tamper to enhance the adhesion of the slabs to the base and reduce the risk of settling in the future.
| Stages of Laying Slabs on a Gravel Base | Task |
|---|---|
| Preparing the Substrate | Clear and level the area, lay gravel |
| Marking the Area | Define the area for laying the slabs |
| Laying the Slabs | Strictly adhere to the laying technology |
| Filling the Joints | Properly fill the joints to avoid water penetration |
| Compacting and Finishing Work | Compact the surface to improve adhesion |
To extend the service life of the laid slabs, it is important not to forget about regular maintenance:
– Periodically clean the slabs from dirt and debris.
– Monitor the joints and add sand to fill them as needed.
– Watch for cracks and issues with the surface.
By following these recommendations for laying paving slabs on a gravel base, you will obtain a reliable and durable road surface that will serve for many years and please the eye.
Laying on a Sand Base
The process of laying slabs on a sand base begins with careful preparation, as the quality of this base directly affects the stability and durability of the road surface. Sand has its advantages, such as ease of installation and the ability to absorb small irregularities, but it must be handled carefully to prevent slab deformation.
Before laying the slabs, it is important to properly prepare the sand base:
1. Cleaning the Area. Remove all plant debris, trash, and other items that may interfere with creating a level surface. Use shovels and rakes to clean the area.
2. Determining the Sand Level. Use a level to ensure the correct depth of the sand layer. The optimal thickness of the sand layer is usually between 5 and 10 cm. This will allow for adequate drainage.
3. Compacting the Sand. Before laying the slabs, it is necessary to compact the sand. This can be done using special tamping equipment or manually. Compaction will help prevent settling and deformation of the slabs.
Technological Nuances of Laying Slabs on a Sand Base:
– Laying the Slabs. Start laying from one corner of the area. The slabs should be laid in a staggered pattern or in straight rows, depending on the chosen design. Leave small gaps between the slabs for filling the joints, which usually do not exceed 5-10 mm.
– Level Control. Use a level or straightedge to monitor the horizontal alignment of the surface during the laying process. This will help avoid puddles and maintain the aesthetic appearance of the surface.
– Adjusting the Slabs. After laying, the slabs can be adjusted with a light tap of a rubber mallet for a tighter fit against the base.
Final Steps of Laying:
1. Filling the Joints. After laying the slabs, fill the joints with clean sand or special mixtures. This will prevent moisture accumulation under the slabs and the growth of weeds.
2. Compacting the Surface. Re-compact the laid slabs using a tamper. This will provide additional stability and reduce the risk of deformations.
| Stages of Laying Slabs on a Sand Base | Description |
|---|---|
| Cleaning the Area | Remove debris and vegetation from the area. |
| Determining the Sand Level | Ensure the optimal thickness of the sand layer. |
| Laying the Slabs | Strictly adhere to the technology of laying the slabs. |
| Filling the Joints | Ensure stability of the surface by filling the joints. |
| Compacting the Surface | Improve the adhesion of the slabs to the sand. |
Regular maintenance of the laid slabs:
– Clean the slabs from dirt and debris.
– Add sand to the joints as needed.
– Monitor the condition of the surface and repair any cracks in a timely manner.
By following these recommendations for laying paving slabs on a sand base, you will achieve an aesthetic and reliable surface that will last long and please the eye with its appearance.
Laying on an Asphalt Base
Laying slabs on an asphalt base has its own peculiarities that need to be considered to achieve reliable and aesthetically pleasing results. Asphalt is a popular choice for laying paving slabs as it provides flexibility, load resistance, and good cushioning. However, to successfully lay slabs on an asphalt base, certain recommendations must be followed.
Before laying the slabs, it is important to carry out thorough preparation of the base:
1. Checking the Condition of the Asphalt. The surface should be level, without cracks and potholes. If there are defects in the asphalt, they need to be repaired. Small cracks can be filled with special sealants, while larger potholes should be fixed with asphalt repair.
2. Cleaning the Surface. Before laying the slabs, be sure to clean the asphalt from dirt, debris, and vegetation. This will prevent deterioration of adhesion between the slabs and the base.
3. Insulation. When laying slabs in areas with high humidity, consider using waterproof materials or membranes that will prevent water from penetrating under the slabs.
The technology for laying slabs on an asphalt base includes the following stages:
1. Laying the Slabs. Start laying the slabs from one of the corners or edges of the area, maintaining even gaps between the slabs that do not exceed 5-10 mm. Plastic spacers may be useful for accuracy.
2. Level Control. During the laying process, regularly check the horizontal alignment of the slabs using a level or laser level. This will help avoid unevenness and puddles on the surface.
3. Increasing Adhesion. After laying the slabs, it is important to press them firmly into the base by tapping with a rubber mallet to achieve optimal contact.
4. Filling the Joints. After completing the laying, fill the joints between the slabs with a mixture of sand and cement or special joint filling materials. This will not only improve the appearance but also prevent weed growth and moisture penetration.
5. Compacting. Compact the laid slabs using a mechanical tamper to enhance the reliability of the surface and reduce the risk of deformations.
| Laying Stage | Description |
|---|---|
| Checking the Asphalt | Assessing the condition of the base, cleaning from dirt. |
| Laying the Slabs | Strict adherence to the laying technology. |
| Filling the Joints | Using mixtures to fill the joints and prevent weed growth. |
| Compacting | Improving the adhesion of the slabs to the base. |
Caring for the laid slabs will ensure their long-term use. Regularly clean the surface from dirt and debris, monitor the condition of the joints, and pay attention to any cracks.
By following these recommendations, you can successfully lay slabs on an asphalt base, achieving a reliable and aesthetically pleasing road surface that will last for many years.
Choosing Levels and Markings
 After choosing the correct level and markings of the prepared base, the next step is to perform precise markings that will help ensure perfect slab laying. This is especially important, as even minor deviations can lead to unsightly joints and uneven surfaces overall.
Before starting the marking, it is advisable to survey the area and establish which architectural or natural landscape elements can serve as reference points. For example, your outer walls, wooden plantings, or even previously laid elements can serve as permanent anchor points.
For marking, you will need the following tools:
- Measuring tape.
- Level or laser level.
- Several bright stakes or markers.
- String or cord for marking straight lines.
Stages of Marking the Area:
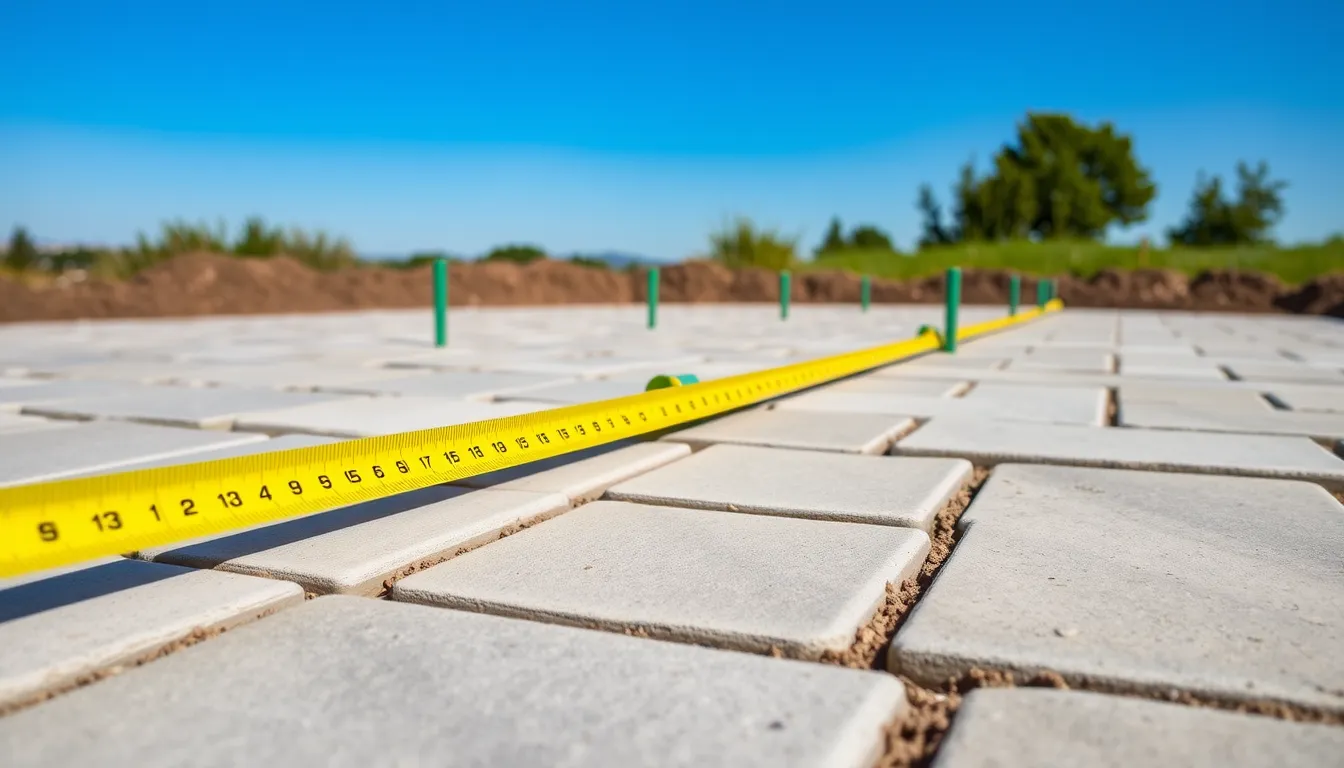
1. Defining the Laying Stages. Start by determining the edges of the area where the slabs will be laid. Using a measuring tape, measure the appropriate distances from the reference points to determine where to start laying.
2. Installing Stakes. Place stakes at the chosen points that will serve as the corners of your new road area. Leave enough distance between them for possible movement, but no less than half a meter.
3. Marking the Lines. Stretch the string between the stakes to create clear lines. This will not only help control the correctness of the area formation but will also serve as a guide during the laying of the slabs.
4. Checking the Level. It is important to check that the strings you have stretched are level, for which you can use a level. This will prevent unevenness during the laying process.
5. Additional Check. After completing the work, all lines should be checked again by project participants to prevent further misunderstandings during the laying of the slabs.
The next step will be preparing the tools for work. Ensure that all the necessary tools are ready before starting the marking, as this will help avoid wasting time during the laying process.
| Tools for Marking | Description |
|---|---|
| Measuring Tape | For measuring distances between stakes. |
| Level | For checking the horizontal alignment of the area. |
| Stakes | For marking the edges of the laying. |
| String | For stretching cross lines. |
By following these tips, you are guaranteed to achieve the correct results in your work. After all, laying paving slabs is a responsible stage that determines the final appearance and functionality of the road surface. Successful marking will help create a quality, aesthetic, and reliable surface that will please you for many years.
Marking the Area for Laying
Before starting the laying of paving slabs, it is necessary to prepare all the tools that will be required for this process. The right choice of tools will not only simplify your work but also improve the quality of the work performed. Here’s what you need for laying slabs and what tools may be required:
- Joint Gauge: This tool allows you to accurately measure the width of the joints between the slabs, ensuring uniformity in laying and the aesthetic appearance of the surface.
- Measuring Tape: This tool can accurately measure areas, planning how many slabs are needed to complete the project.
- Level or Laser Level: This tool is critically important for controlling the horizontal position of the slabs and preventing unevenness in the surface.
- Rubber Mallet: Use it for careful laying of the slabs, as it helps avoid damaging the surface of the slabs during installation.
- Spatula: This will be needed for applying glue to the slabs, especially if you are using ceramic or natural stone slabs.
- Bucket for Mixing Solution: If the laying involves using cement mixtures, this bucket will be necessary for mixing.
- Trowel: Ideal for laying slabs and filling joints.
- Tamper: Used for compacting the base before laying the slabs, which is a mandatory step for the durability of the surface.
- Pick and Shovel: Needed for preparing the area and removing vegetation or existing coverings.
| Tool | Purpose |
|---|---|
| Joint Gauge | For controlling the width of the joints between the slabs. |
| Measuring Tape | For accurate measurement of areas. |
| Level or Laser Level | For checking the horizontal position of the slabs. |
| Rubber Mallet | For careful laying of the slabs without damage. |
| Spatula | For applying glue. |
| Bucket | For mixing materials. |
| Trowel | For filling joints and laying. |
| Tamper | For compacting the base before laying the slabs. |
| Pick and Shovel | For preparing the area. |
By following this list of tools, you will be able to perform the laying of paving slabs at the highest level. Using the right tools will allow you to create a beautiful and reliable road surface that will please the eye and serve you for many years.
Preparing Tools for Work
Before laying the slabs, it is important to prepare all the necessary tools and materials that will help organize the laying process as efficiently as possible. Proper preparation will not only speed up the work but also improve the quality of the laid slabs, which will affect the overall integrity and appearance of your road surface.
Here’s a list of tools that may be needed:
- Measuring Tape: This is the main tool for measuring distances and determining the required amount of slabs. Accurate measurements will help you avoid unnecessary material waste.
- Level or Laser Level: A critically important tool for controlling the horizontal alignment of the laid surface. It will help identify unevenness before laying begins, which is a guarantee of the durability of the slabs.
- Rubber Mallet: Use it for careful laying of the slabs, as it allows you to avoid damage that could be caused by regular hammers.
- Spatula: If you are laying slabs on a glue base, the spatula will be useful for evenly distributing the glue.
- Gravity Transporter: This tool will help check vertical and horizontal lines during the laying of the slabs.
- Tamper: Necessary for compacting the base before laying the slabs. Good compaction prevents deformations of the surface in the future.
- Trowel: Used for laying and filling joints, especially at the final stage of work.
- Bucket for Water and Cement: Needed for mixing cement solutions if the laying of slabs involves using mixtures.
- Pick and Shovel: Designed for preparatory work, such as removing vegetation and leveling the area.
| Tool | Purpose |
|---|---|
| Measuring Tape | For precise measurement of distances. |
| Level | For checking the horizontal alignment of the surface. |
| Rubber Mallet | For careful laying of the slabs. |
| Spatula | For even application of glue. |
| Gravity Transporter | For checking the basic line of laying. |
| Tamper | To aid in compacting the base. |
| Trowel | For filling joints and laying. |
| Bucket | For mixing materials. |
| Pick and Shovel | For preparing the area. |
By following these recommendations, you will be able to prepare the necessary tools for laying paving slabs, which will be the key to successful work and quality results. Using appropriate tools will significantly increase the chances that your road surface will last for many years, maintaining its aesthetic appearance and functionality.
Technology of Laying Paving Slabs
When laying paving slabs, the correct technique plays an important role. This is not only an aesthetic process but also a scientifically grounded activity that requires consideration of a number of factors to ensure the longevity of the road surface.
First of all, it is important to adhere to the technological process of laying, starting from the preparation of the base and ending with filling the joints. Incorrect or careless actions at any of these stages can lead to deformations or destruction of the surface.
Overcome project difficulties with proper preparation – it is important to eliminate all impurities, vegetation, and debris from the area. The condition of the base can affect the result, so before laying the slabs, it should be thoroughly tested for levelness, density, and drainage properties.
Main Stages of the Technology for Laying Slabs:
1. Marking the Area: Before starting work, it is very important to properly mark the territory. Using a stretched cord or string will help create clear contours for laying. When marking, it is also worth calculating the level to control the horizontal alignment.
2. Laying the Slabs: When laying the slabs, work should start from one of the edges or corners. For convenience, use special plastic spacers to determine the joints. It is important to try to maintain the same size of the joints.
3. Filling the Joints: After laying, fill the joints with clean sand or ready-made mixtures, which will reduce the risk of water accumulation and weed growth. Constant monitoring of the condition of the joints prevents their gradual washing out.
4. Compacting the Surface: Performing compaction of the slabs after laying improves the adhesion of the slabs to the base. For this, you can use a mechanical tamper.
| Laying Stage | Description |
|---|---|
| Marking the Area | Establish clear contours for laying the slabs. |
| Laying the Slabs | Adhere to uniformity and joint standards. |
| Filling the Joints | Using sand or special mixtures to prevent water penetration. |
| Compacting the Surface | Optimizing adhesion and preventing deformations. |
Caring for the Laid Slabs plays a decisive role in maintaining their aesthetic and technical characteristics. Regular cleaning from dirt, monitoring the condition of the joints, and timely filling of sand into the joints should be the norm to keep your road surface in excellent condition.
By adhering to the technology of laying paving slabs, you will not only ensure a flawless appearance of the surface but also guarantee its durability. This, in turn, will allow you to optimally use your territory.
Laying Slabs with Decoration
 Laying slabs with decoration opens up numerous possibilities for creating an aesthetically pleasing and functional road surface. Thanks to the variety of textures, colors, and shapes of paving slabs, you can not only solve practical tasks but also realize your design ideas.
Decoration should always be based on practicality. It is important that not only aesthetic improvements but also functional aspects are considered during the laying of the slabs. For example, you can combine slabs of different colors to create contrasting patterns, but at the same time, remember that the texture of the slabs should provide good grip, especially in rainy conditions.
The technique of laying slabs with decoration:
1. Design Planning: Before starting the laying, prepare a style and vision. You can use diagrams that will suggest how best to arrange the slabs to achieve the desired effect.
2. Using Different Shapes of Slabs: Figured slabs can become a key element of your decoration. Using slabs of different shapes in combination with traditional rectangular or square options will help create an original look. For example, “blocks” can be alternated with “stones” to create an interesting pattern.
3. Creating Paths and Zones: Using slabs of different colors will help visually divide the area into functional zones, such as a relaxation area or a path leading to the entrance. This can be especially useful in large gardens or plots.
4. Imitating Natural Materials: You can choose slabs that imitate natural stone or wood. This will create a natural atmosphere in your garden or on the property. Color gradients used during laying can add additional depth and texture.
5. Correction Means: Using instant glue or resins applied to the joints can highlight patterns or give the surface a durable effect.
6. Lighting System: After laying the slabs, you can not only use decorative elements but also think about lighting that will highlight the unique appearance of the slabs. LED strips that illuminate the outer contours will add aesthetic appeal in the evening hours.
| Decoration Stage | Description |
|---|---|
| Design Planning | Developing sketches and choosing the style of laying the slabs. |
| Choosing Slabs | Combining different shapes and colors to create patterns. |
| Creating Zones | Designing visual paths for dividing the area. |
| Connecting Lighting | Using LED lighting to highlight the aesthetics of the surface. |
Caring for the Laid Decorative Surface is also an important aspect of maintaining its original appearance. Periodic cleaning of the slabs from dirt and leaves, monitoring the condition of the joints, and timely filling with sand will help preserve the aesthetics and functionality.
In general, laying paving slabs with decoration is not just a mechanical process. It is an art that allows you to create an impressive and refined road surface that pleases the eye and performs functional tasks.
Choosing Paving Slabs
Decorative elements in the laying of paving slabs can not only emphasize the aesthetics of your space but must also be practical in use. When choosing slabs, it is important to maintain a balance between stylistic design and functionality. Choose slabs that are resistant to external influences, as this will ensure not only a beautiful appearance but also the durability of the surface.
During the laying process, it is also important to consider the advantages of the materials. For example, natural stone slabs can give your pedestrian surface sophistication, but they may be less resistant to mechanical damage compared to concrete slabs. Here are some key recommendations for using decorative elements:
| Type of Decorative Elements | Advantages |
|---|---|
| Natural Stone | Aesthetics, durability, resistance to loads. |
| Borders | Clearly delineate flower beds and paths, adding aesthetic appeal. |
| Combined Slabs | Ability to create unique patterns, Cyrillic designs. |
| Bright Slabs | Adds liveliness to the space, easily visible in the dark. |
Combining different types of slabs can also be an effective solution for optimizing your road surface. By combining flat elements with textured ones, you not only improve grip on the path but also emphasize the individual style of your area.
Laying slabs can include various techniques, such as laying in a checkerboard pattern, alternating colors or shapes of slabs. This will not only achieve a beautiful result but also make your road surface more functional.
Special attention should also be paid to beneficial design, complementing the laid surface with decorative plants that will give it a natural look.
Thus, aiming to achieve the most harmonious and effective result, pay attention to the combination of decorative elements and their compatibility with the overall design of the paving slabs.
Environmental Aspects of Laying Slabs
 Environmental aspects of laying slabs are an important component when planning and implementing a paving slab project. Modern technologies and materials usually involve the inclusion of environmental factors, ensuring not only aesthetic but also sustainable construction approaches.
One of the key points is the choice of materials. Among modern solutions, there are slabs made from recycled materials or environmentally friendly additives. Using such slabs reduces the negative impact on the environment, as they are produced without the use of harmful substances. This is an important factor for consumers who care about their health and the health of future generations.
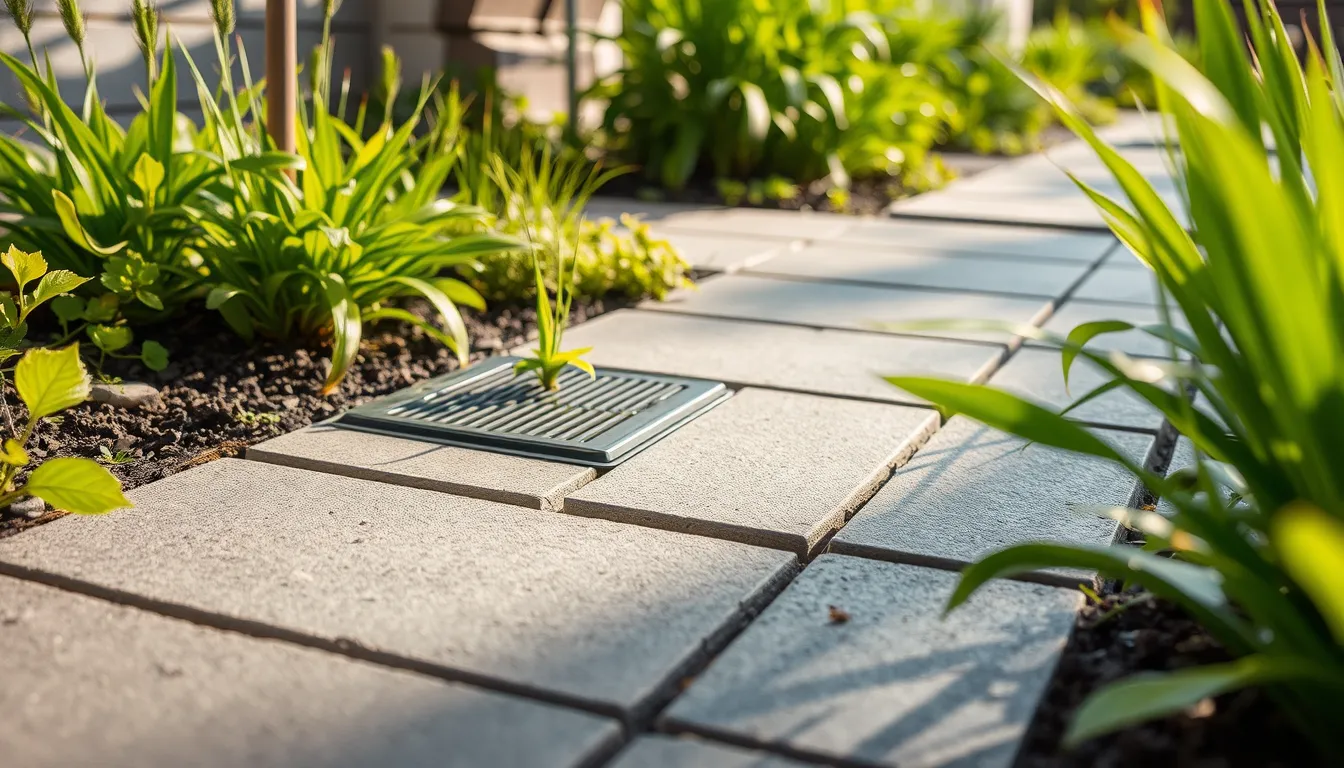
Additionally, water management during the laying of paving slabs can significantly improve the environmental situation on the site. For example, using drainage systems that ensure proper drainage of rainwater is an important element in preventing the area from becoming waterlogged. Favorable solutions include drainage ditches and water drainage systems that not only keep the slabs in good condition but also enhance the overall ecological balance in the area.
Choosing green technologies can also include planting eco-plants or using water collection systems that not only beautify the area but also provide additional ecological functions, such as reducing the ambient temperature due to shade. They can enhance the aesthetic appeal of the area while improving air quality.
| Environmental Aspect | Advantages |
|---|---|
| Recycled Materials | Reduces impact on the environment. |
| Drainage Systems | Provides control over rainwater, preventing waterlogging. |
| Green Plantings | Improves aesthetics and air quality. |
Regular maintenance of the laid slabs also has an ecological effect. Cleaning from pollutants and dust retention using eco-friendly agents will be a good approach to maintaining a healthy safe environment. Cleanliness of the slabs and the joints between the slabs prevents the proliferation of bacteria and mold, which can be harmful to health.
Overall, the environmental aspects of laying slabs play a significant role in creating not only a beautiful but also a healthy living environment. By paying attention to the choice of materials, laying technologies, and subsequent maintenance, you will not only ensure the durability of the road surface but also contribute to improving the ecological situation in your area.
Service Life of Paving Slabs
The service life of paving slabs directly depends on many factors, such as the quality of materials, the correctness of laying, the mode of operation, and maintenance of the surface. It is important to remember that even the highest quality slabs will not last long if certain laying technologies and operating conditions are not followed.
One of the main factors in the durability of the slabs is the quality of the materials. High-quality paving slabs made from concrete or stone mixtures have significantly greater resistance to wear, weather effects, and mechanical loads. For example, slabs with high frost resistance can withstand cyclic freezing and thawing without breaking, which is especially important in regions with cold winters. Studies show that frost-resistant slabs can last up to 30 years with proper operation.
Proper laying also affects the service life of the slabs. It is important that the base is well prepared: leveled, compacted, and cleaned of debris. The laying technology must adhere to all requirements: the slabs should be laid with even joints, and the distance between them should not exceed 5-10 mm. This ensures even load distribution and reduces the risk of surface deformation.
Operating conditions are also important. If the road surface is subjected to significant mechanical loads, such as for parking lots or driveways, materials that can withstand high loads should be used. In these cases, slabs made from high-strength concrete mixtures are more suitable.
Maintenance of the slabs is no less important for ensuring their durability. Regular cleaning from dirt, leaves, and debris, as well as monitoring the condition of the joints and timely filling with protective solutions or sand, will help avoid moisture accumulation in the joints, which can lead to deformations.
| Factor | Impact on Operation |
|---|---|
| Material Quality | High-quality materials extend the service life of the slabs. |
| Laying Technology | Improper laying can lead to deformations and cracks. |
| Operating Conditions | High loads shorten the service life of the surface. |
| Maintenance | Regular maintenance prevents premature wear of the slabs. |
In conclusion, it is important to understand that laying paving slabs requires a comprehensive approach to selecting materials, adhering to technology, and maintaining the surface. By doing so, you can ensure the long-term operation of your road surface, which will not only serve reliably but also please the eye with its aesthetic appearance.
Laying Paving Slabs by Yourself
Laying paving slabs by yourself can be both an interesting and challenging process, but by following a few simple steps and recommendations, you can achieve excellent results. Before you start, it is important to understand in detail that laying slabs is not limited to just the physical process — it also includes planning and preparation.
The first step is preparing the area. You need to clear the territory of old coverings, vegetation, and debris. Then it is important to level the surface. For this, use a level and a tamper to compact the soil. If the base is not adequately prepared, the slabs may begin to settle or crack over time.
Next, you need to choose the materials. A classic option is concrete slabs. However, if you want something more aesthetic, you can choose slabs made of natural stone or brick. It is also important to pay attention to frost resistance, water permeability, and wear resistance of the chosen slabs.
After choosing the slabs, mark the area for laying. This can be done using string and stakes, which will allow you to clearly mark the boundaries of the laying. Proper marking is the key to a neat and professional appearance of your surface.
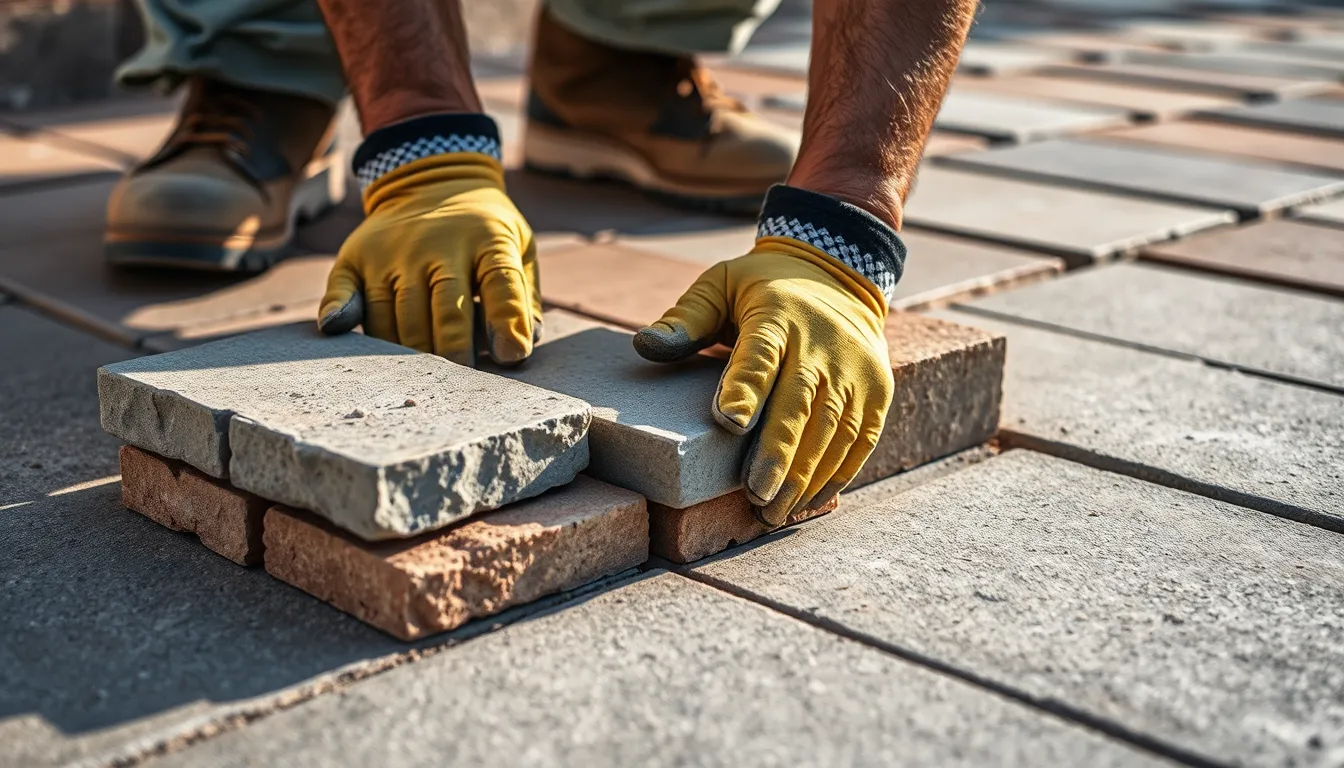
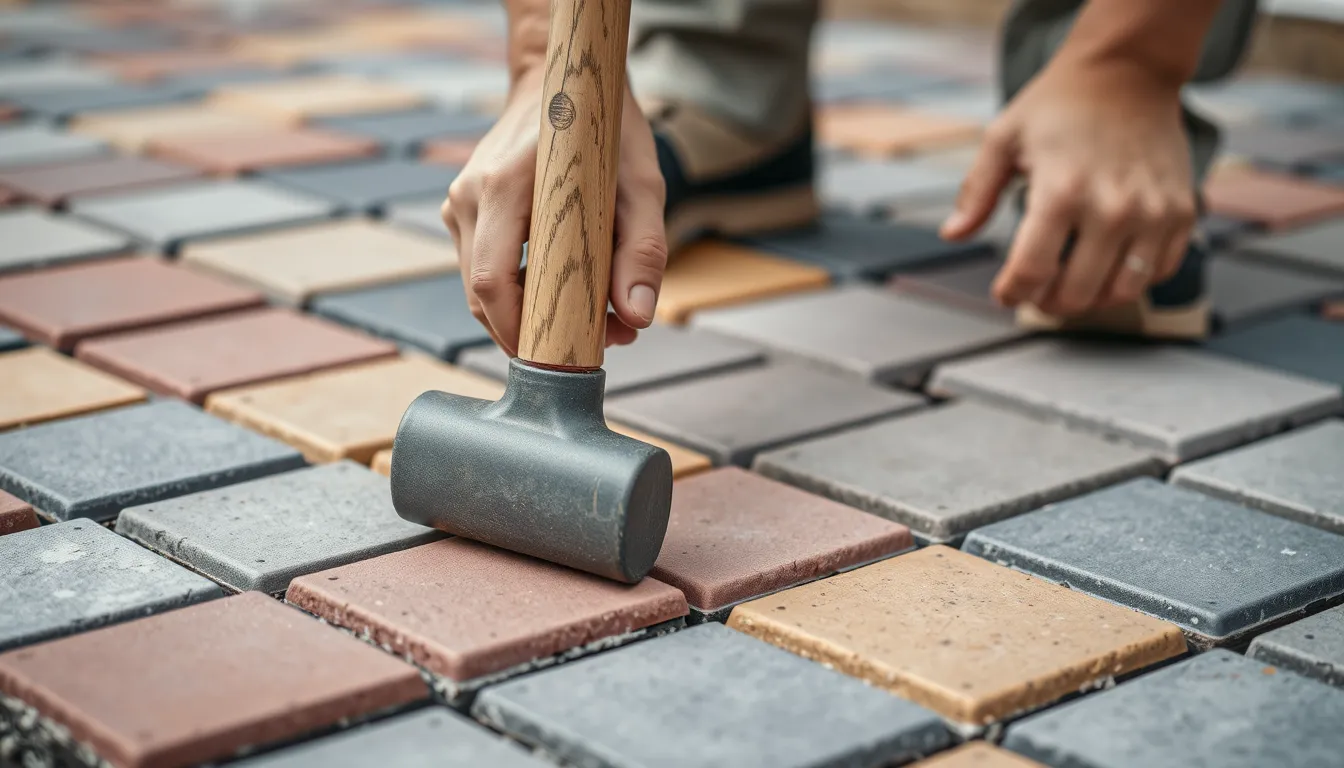
Now it’s time to lay the slabs. It is recommended to start laying from one of the corners. The slabs should be laid tightly against each other, leaving small gaps for filling the joints. Monitor the evenness of the laying using a level. If necessary, use a rubber mallet to adjust the position of the slabs.
Don’t forget to fill the joints. After laying the slabs, use clean sand or special ready-made mixtures to fill the joints. This not only strengthens the adhesion of the slabs to the base but also prevents water accumulation.
Finally, it is important not only to lay the slabs but also to regularly care for them. Cleaning from dirt and monitoring the condition of the joints will help maintain the aesthetic appearance of the road surface for a long time.
| Laying Stage | Description |
|---|---|
| Preparing the Area | Clear the territory and level the soil. |
| Choosing Materials | Choose slabs according to aesthetic and functional requirements. |
| Marking | Mark the boundaries for laying the slabs. |
| Laying the Slabs | Lay the slabs while maintaining evenness and distances between them. |
| Filling the Joints | Fill the joints with sand or a ready-made mixture. |
By following these simple tips, you will be able to lay paving slabs by yourself and create a beautiful and functional road surface.
Common Mistakes in Laying
Common mistakes in laying paving slabs can significantly affect the quality and durability of the road surface. Even experienced craftsmen can encounter carelessness or ignorance of certain aspects, leading to negative consequences. Let’s consider the most common mistakes to avoid ensuring the best result.
The first mistake is insufficient preparation of the base. Many builders neglect thorough leveling and compacting of the base, thinking that the slabs will mask these deficiencies. However, if the base is not properly prepared, the service life of the slabs can be significantly shortened. It is important to carry out cleaning and compacting of the base to avoid settling and deformations of the slabs in the future.
| Type of Mistake | Consequences | Recommendations |
|---|---|---|
| Insufficient Base Preparation | Settling of slabs, cracks | Thoroughly prepare and compact the base. |
| Incorrect Choice of Materials | Low quality of the surface, rapid destruction | Choose slabs considering the operating conditions. |
| Incorrect Laying of Slabs | Deformations, unevenness | Follow the correct laying technology. |
The second mistake is choosing inappropriate materials. Using slabs that do not meet the operating conditions can lead to rapid destruction. For example, laying slabs with low frost resistance in cold regions can cause cracks. Ignoring this can lead to the belief that the problem lies in the slabs themselves, rather than in their selection.
The third mistake is neglecting documentation. Laying paving slabs without following the recommended technological maps and manufacturer instructions can also lead to problems. During laying, it is important to adhere to all recommendations regarding the surface, joints, and appropriate thickness of the base. A small inaccuracy can lead to significant problems that require costly renovation.
The fourth mistake is ignoring drainage issues. Many people do not realize how important it is to properly organize a drainage system that can prevent water accumulation under the slabs. Water that is retained can lead to the surface lasting significantly less than planned.
To avoid common mistakes during slab laying, it is important to follow all the recommendations mentioned above. The correct choice of materials, comprehensive preparation of the base, attentiveness during the laying process, and care for drainage will bring both aesthetic and functional benefits, significantly increasing the durability of your road surface.
Cost of Laying Paving Slabs
Laying paving slabs is a process that requires not only technical skills but also financial expenses. Like any construction project, the cost of laying slabs depends on various factors that are important to consider when planning your budget.
Materials are one of the most significant factors affecting the overall cost of laying. Products such as concrete, stone, or ceramic slabs have different price categories. For example, concrete slabs are usually the most economical option, while natural stone can significantly increase the cost of laying. It is worth conducting a preliminary analysis of available materials on the market and choosing those that best meet your aesthetic and financial requirements.
| Type of Slab | Average Cost per m² | Advantages | Disadvantages |
|---|---|---|---|
| Concrete Slabs | 180-300 UAH | Low cost, high durability | Can crack under heavy loads |
| Stone Slabs | 400-600 UAH | Aesthetics, high durability | Higher cost, complexity of laying |
| Ceramic Slabs | 250-500 UAH | Variety of colors and shapes | Possible frequent deformation, sensitivity to impacts |
The next important factor is base preparation. The quality of preparation will directly affect the durability of the surface and, accordingly, the overall costs. It is necessary to ensure a certain level of compaction and evenness of the base, which may require the use of additional equipment and materials.
Experience of the Layers can also be decisive. The cost of laying slabs by a specialist can vary depending on the level of experience, the complexity of the project, and the geographical location. Usually, professional layers have a higher service cost, but they provide quality results, avoiding common mistakes.
| Service | Average Cost per m² | Description |
|---|---|---|
| Laying Slabs by a Specialist | 150-300 UAH | Experienced layer, quality guarantee |
| Self-Laying | 0 UAH (cost of materials) | Saving on services, but risk of mistakes |
Additional expenses may include transportation costs for materials, costs for tools, as well as possible expenses for drainage systems or backfill to improve the functionality of the surface. It is important to consider all of this when planning.
So, if you are considering laying paving slabs, carefully analyze all expenses, choose appropriate materials, and, if possible, consult professionals. This will help you not only save money but also ensure a durable and quality road surface that will please you with its reliability and aesthetics.
Professional Tips
 Professional tips can always be useful for those planning to lay paving slabs. In this process, it is important to adhere to high-quality standards, as this affects the service life of the surface.
Here are some key tips to help you achieve the best results:
1. Plan the work in advance. Before starting the laying of the slabs, it is necessary to develop a clear plan. Determine which area you will be laying, and calculate how many slabs will be needed. Keep in mind that it is better to buy a little more materials than you need to have a reserve in case of breakage.
2. Check the level of the base. Quality preparation of the base is the key to success in laying. Use a laser level or a simple level to ensure that your base is as level as possible. An improperly prepared base can lead to deformation of the slabs during operation.
3. Pay attention to drainage. During the laying of the slabs, it is important to foresee a drainage system that will prevent water accumulation. This is especially relevant during the rainy season. The slope of the area should be such that all water drains in one direction, ensuring long-term operation of the surface.
4. Use the right tools. For laying the slabs, you will need several basic tools, such as a rubber mallet, level, and spatula. All tools should be prepared in advance – this will help you work more efficiently and avoid delays.
5. Monitor the width of the joints. The width of the joints between the slabs should be even and meet technological requirements. Use plastic spacers to easily control the distance. This will prevent the joints from narrowing under pressure and ensure proper drainage of water.
6. Regularly clean the surface. After completing the laying, do not forget about caring for the slabs. Clean them from dirt and debris, and also monitor the condition of the joints. This will not only improve the aesthetic appearance of the surface but also increase its durability.
| Action | Description |
|---|---|
| Planning | Determine the area and the amount of slabs. |
| Checking the Base | Control the evenness of the base for laying. |
| Drainage | Foresee a water drainage system. |
| Choosing Tools | Prepare all necessary tools. |
| Monitoring Joints | Use plastic spacers. |
| Caring | Regularly clean the slabs and monitor the joints. |
By following these recommendations, you will be able to successfully lay paving slabs that will serve you for a long time, please the eye, and be functional in use.