Paving is one of the most popular materials for landscaping yards or adjacent areas. It looks attractive, lasts long, and withstands significant loads. Many are interested in the question: how to make paving by hand and whether it is possible at home without special experience? In this article, we will detail:
- Preparation of the base and area.
- Making paving by hand (if you want to make tiles yourself).
- Laying paving by hand (how to properly arrange and secure ready-made products).
- Options for filling joints, including polymer sand for paving.
By following our step-by-step plan, you will learn how to make paving at home, what to pay attention to when choosing materials, and what mistakes to avoid.
Useful videos on the topic that I recommend watching
1. Defining the purpose and type of paving
Before starting work, it is essential to understand what exactly you need paving for:
- For garden paths or pedestrian areas.
- For a yard with possible vehicle access.
- For decorative elements of landscape design.
Depending on the purpose, the thickness of the paving and the type of material (concrete, clinker, natural stone, etc.) are chosen. If you plan to make paving by hand, focus on concrete mixtures with or without pigments.
2. Preparing the area
Before starting laying paving by hand, be sure to prepare the base. This stage affects the strength of the covering and prevents uneven settling of the tiles.
-
Marking the area
- Using a tape measure and string, determine the desired area for laying.
- Mark the boundaries with stakes or string to make it clear where the area ends.
-
Removing the top layer of soil
- Remove grass, weeds, stones, and tree roots.
- Depending on the thickness of the paving and the cushion (sand, gravel), the depth of the excavation can be 15–30 cm.
-
Leveling and compacting
- Carefully level the surface with a shovel and rake.
- For better stability, it is advisable to compact the soil using a manual tamper or vibrating plate.
Tip: Be sure to provide a slight slope (1–2 cm per 1 m) towards the drainage of water, so that rainwater does not accumulate on the surface of the paving.
3. Creating a cushion (base)
Depending on the purpose of the covering and the type of soil, the base can be made from various materials:
-
Sand and gravel base
- First, pour a layer of gravel (5–10 cm) and compact it well.
- On top, add a layer of sand (5–7 cm) and also compact it, leveling it with a rule or board.
-
Using geotextile
- If the soil is too wet or there is a risk of settling, lay a layer of geotextile under the gravel.
- Geotextile prevents the mixing of gravel with soil, increasing the durability of the covering.
-
Concrete screed
- For areas with high loads (vehicle access), a thin concrete screed can be arranged on the compacted base.
- The screed will provide additional rigidity but will increase the time and cost of the project.
4. Making paving by hand (if desired)
If you want not just to lay but also to make paving at home, you will need:
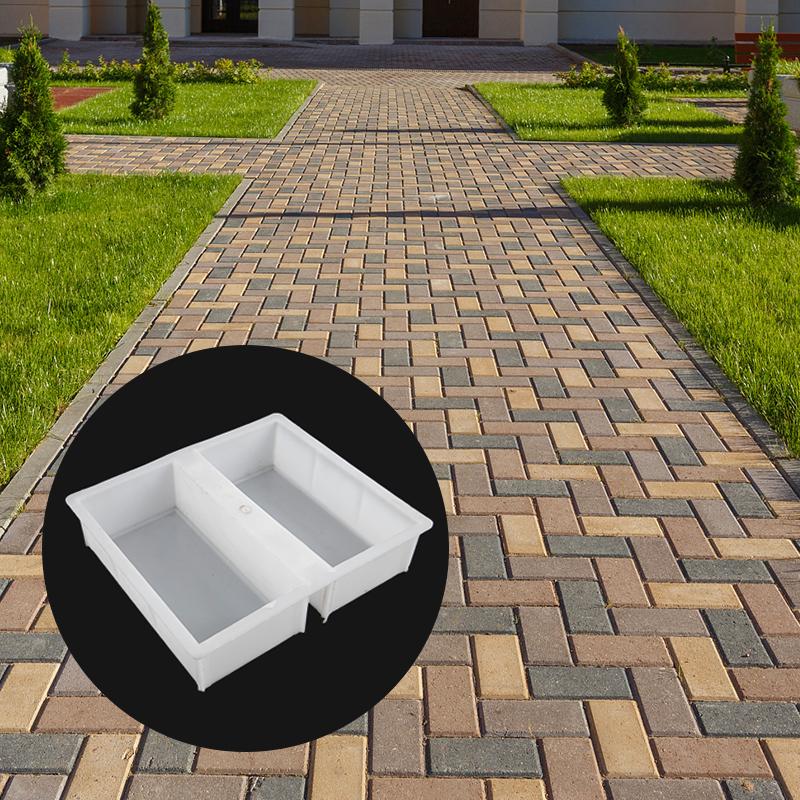
- Molds for pouring tiles (made of plastic, silicone, or homemade wooden ones).
- Cement (not lower than M400), sand, fine fraction gravel.
- Pigments (if you want to give the paving a certain color).
- A container for mixing the solution.
Steps for making:
-
Preparing the solution
- Typically, the ratio of cement, sand, and gravel is taken as 1:2:2 or 1:3:3 (depending on the strength you want to achieve).
- Add water gradually so that the mixture becomes viscous but not too liquid.
-
Pouring into molds
- Lightly grease the molds with machine oil or a special release agent.
- Pour the solution, compact it thoroughly inside the mold (you can tap the mold to release air bubbles).
-
Curing and drying
- Leave the molds in a room with room temperature for at least 24 hours.
- Remove the paving from the molds and let it “ripen” for a few more days, periodically moistening it with water.
Such making paving by hand takes more time, but you can create unique shapes and shades, obtaining an exclusive covering for your yard.
5. Laying paving by hand
After the base is ready (or the paving, if you poured it yourself, has sufficiently hardened), you can proceed to laying paving by hand.
-
Marking and starting the laying
- It is most convenient to start from the far corner and gradually move towards the exit.
- Use a string or laser level to control the evenness of the rows.
-
Laying method
- There are various patterns: “herringbone,” “checkerboard,” “Roman,” “heraldic,” etc. Choose the one that you like best in design.
- Lay the tiles, maintaining equal gaps (usually 2–5 mm).
-
Height adjustment
- Periodically check the level while laying.
- If a tile sinks, you can add a little sand under it. If a tile protrudes, remove the excess sand.
-
Compacting
- After laying a few rows, walk over them with a manual tamper or vibrating plate with a rubber pad to avoid damaging the surface of the paving.
- This will help the tiles “settle” in place and align with each other.
6. Filling joints: cement, sand, or polymer
Once the tiles are laid, they need to be secured by filling the joints. There are several options:
-
Regular sand
- The most accessible and cheapest method.
- Sprinkle dry sand over the surface and sweep it into the joints. Repeat several times until the joints are filled.
- Downside: sand is washed away by rain, and weeds may later sprout in the joints.
-
Sand and cement mixture
- Provides a stronger bond but requires careful application.
- After filling the joints with the mixture, slightly moisten the surface, but do not flood it with water.
- Over time, the mixture hardens but may crack with temperature fluctuations.
-
Polymer sand for paving
- This is a special modern material that hardens upon contact with water and provides waterproof and strong joints.
- Polymer sand for paving prevents weed growth, reduces the risk of “ant hills” and delaminations.
- An ideal choice if you want a durable covering with minimal maintenance.
Tip: If you decide to use polymer sand, carefully follow the manufacturer’s instructions, especially regarding even moistening, so that the material hardens evenly and without voids.
7. Care and usage tips
- Regular cleaning: Over time, dirt, leaves, and moss accumulate on the paving. Periodically clean with a brush or use a pressure washer.
- Restoring joints: If you used regular sand, over time the joints may wash out. You need to refill and compact it.
- Protective coating: For concrete paving, it is useful to apply special sealants or varnish to strengthen the surface and enhance water-repellent properties.
8. Common mistakes and how to avoid them
-
Insufficient compaction of soil and base
- This can lead to settling and unevenness. Always compact each layer thoroughly.
-
Lack of drainage slope
- If the slope is not provided, water will accumulate, causing damage to the covering.
-
Too wide or too narrow joints
- Narrow joints make filling difficult, while too wide ones look unaesthetic and may weaken the structure.
-
Not adhering to the drying time of homemade paving
- If you remove the tile from the molds or start laying too early, the tile may lose strength and quickly deteriorate.
-
Ignoring the manufacturer’s recommendations for polymer sand
- Uneven moistening or incorrect application can cause “sticking” on the surface of the tile and the appearance of stains.
Conclusion
As you can see, making and laying paving by hand is a process that requires careful preparation and adherence to technology. However, the reward for your efforts will be a unique and durable surface that will beautify your yard or garden plot for many years.
Key points to make paving at home successfully:
- Proper marking and preparation of the soil.
- Quality cushion of sand and gravel (if necessary – geotextile or concrete screed).
- Correct making (if you make the tile yourself) and laying paving by hand while maintaining levels and joints.
- Using the appropriate method for filling joints (sand, sand-cement mixture, or polymer sand for paving).
Careful maintenance and adherence to these recommendations will provide you with an aesthetic and functional covering that you will be proud of for many years. If you doubt your abilities or do not have time for all the stages, you can always turn to professionals. In any case, now you know well how to make paving by hand and can competently control the process!