How to Properly Glue Moldings: A Complete Guide to Choosing Materials, Glue, and Installation Technology
Moldings (crown molding) are a stylish decorative element that adds completeness to any interior. Whether you are renovating a living space or working on a commercial project, it is important to know what to use to glue moldings, what to glue moldings to, and how to properly glue moldings to achieve a flawless result. In this guide, we will discuss the types of moldings, materials, tools, optimal glues, and installation steps, as well as answer popular questions such as what can be used to glue moldings, how to glue moldings to a wall, or what is the best surface to glue moldings to.
Interesting Videos on the Topic:
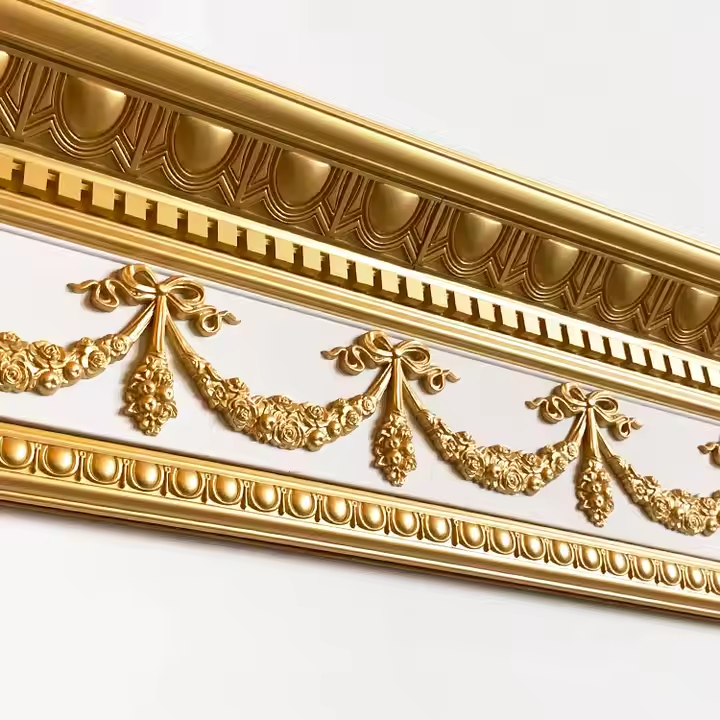
1. What are Moldings and What are They Used For?
Moldings are decorative elements used for finishing ceilings, walls, door, and window frames. They help create a harmonious and complete look in a room, hide joints between different surfaces, and can serve as an aesthetic accent. The installation of moldings can be an element of both classic and modern interiors.
2. Types of Moldings and Their Features
The choice of moldings depends on your design preferences, budget, and the characteristics of the room. The main types include:
2.1 Gypsum Moldings
- Advantages: High quality, detailed texture, aesthetic appearance.
- Disadvantages: Heavy, require special glue, higher price.
- Tip: What to use to glue gypsum moldings? Use special gypsum glue that provides strong adhesion and helps avoid cracks.
2.2 Polyurethane Moldings
- Advantages: Lightweight, resistant to moisture and impacts, do not deform over time.
- Disadvantages: May be slightly more expensive than polystyrene options.
- Tip: When gluing polyurethane moldings, what to glue moldings to? Use universal glues based on acrylic or water that are suitable for this material.
2.3 Polystyrene Moldings
- Advantages: Affordable price, ease of installation.
- Disadvantages: Less resistant to mechanical damage, may require additional protection.
- Tip: If you are wondering what to use to glue polystyrene moldings, choose special mounting glues that provide reliable attachment.
2.4 Wooden Moldings
- Advantages: Natural appearance, eco-friendliness.
- Disadvantages: Require additional coating with varnish or paint for protection against moisture and mechanical damage.
- Tip: What to glue wooden moldings to? PVA glue or special mounting glues for wooden products are ideal.
3. What Materials and Tools are Needed for Installing Moldings?
Before starting work, make sure you have everything you need:
-
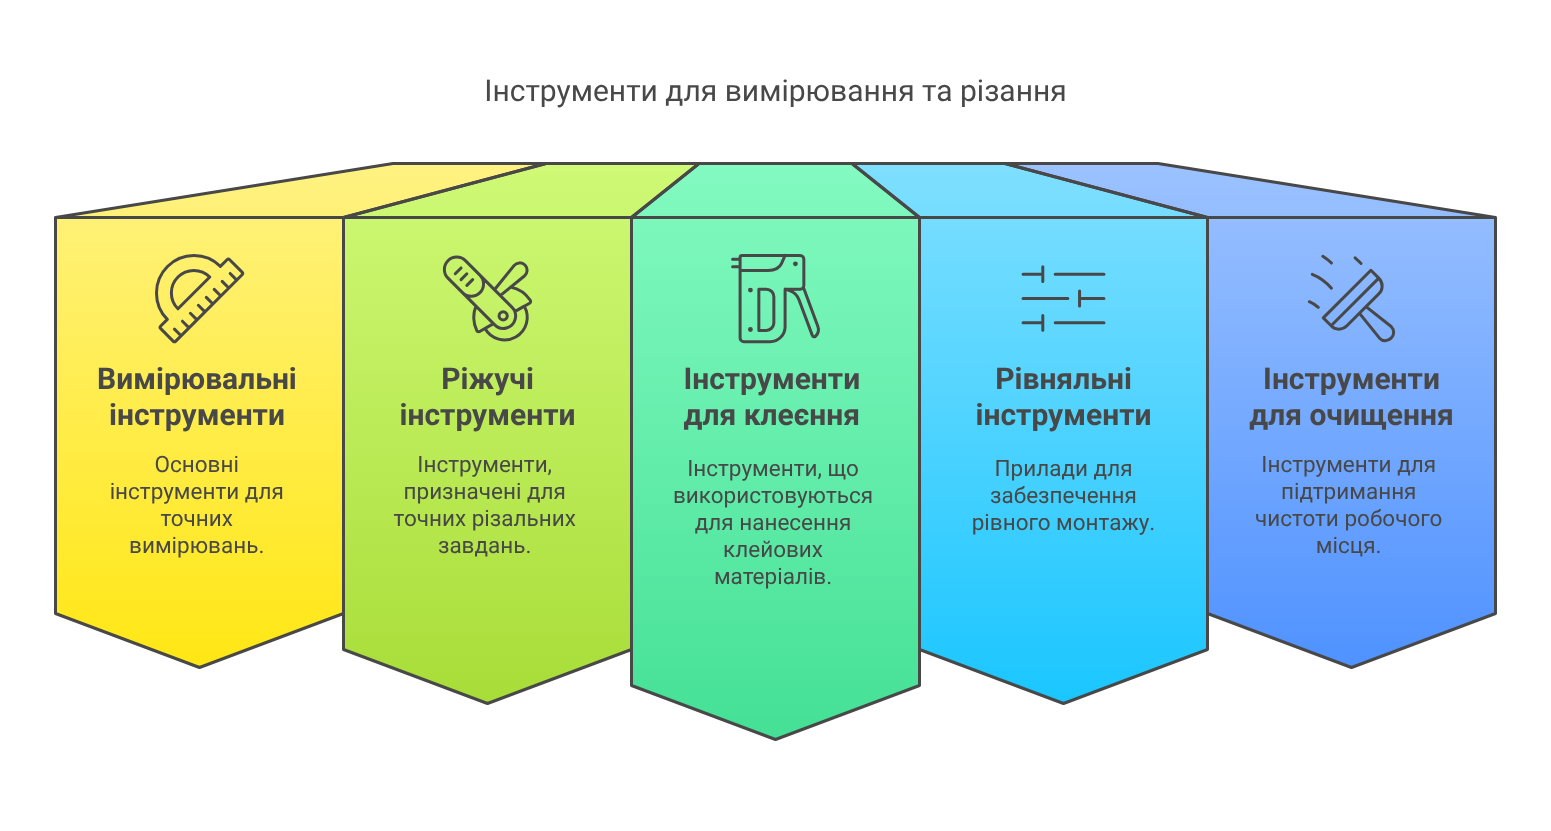
Tools:
- Tape measure, measuring tape, square, and pencil for marking.
- Knife or special saw with a fine blade for precise cutting.
- Spatulas for applying glue.
- Level or laser measurer to check the evenness of the installation.
- Vacuum cleaner or broom for cleaning the surface.
-
Materials:
- The chosen type of moldings (gypsum, polyurethane, polystyrene, or wooden).
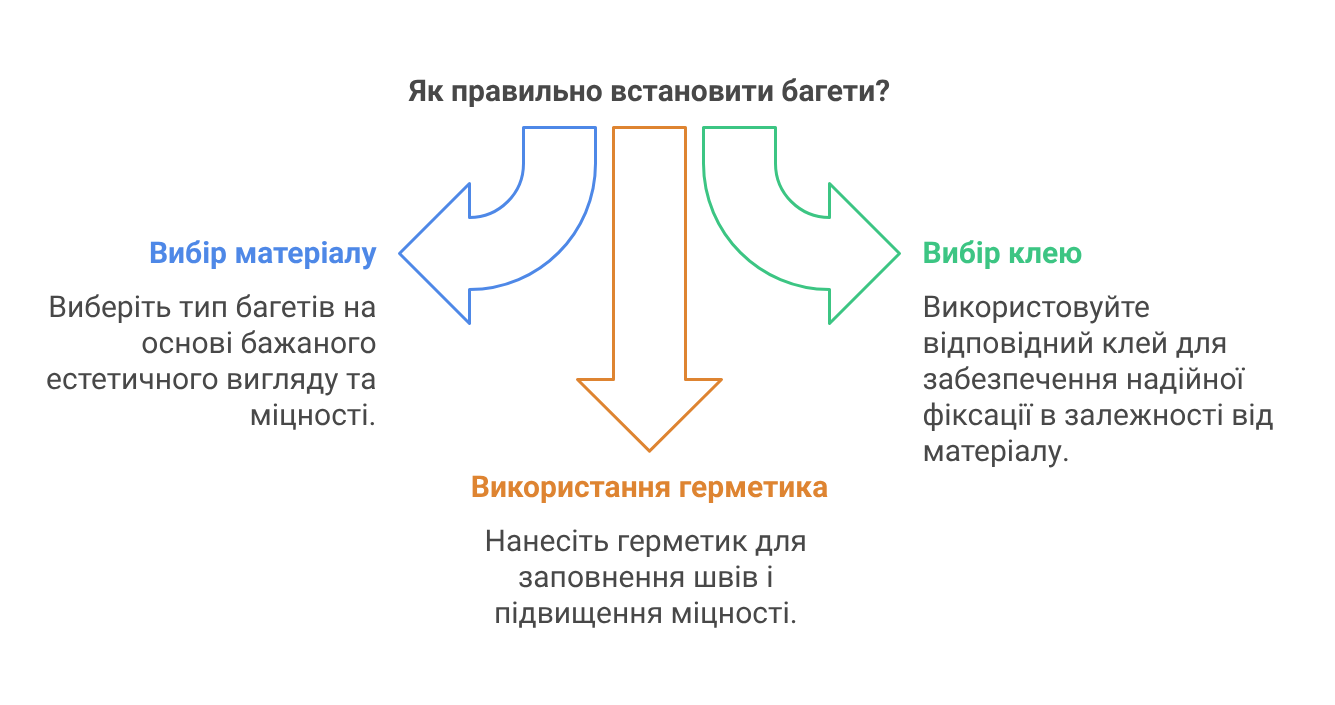
- Glue for moldings: The choice of glue depends on the material of the moldings. For example, gypsum moldings require special gypsum glue, while polyurethane ones need universal acrylic glue.
- Sealant for filling joints and providing additional strength to the installation.
4. Choosing Glue: What to Use to Glue Moldings and What is the Best Surface to Glue Moldings To?
The correct choice of glue is the key to successful installation. Here are some recommendations:
- Gypsum Moldings: Use special gypsum or cement glue. It provides strong adhesion and takes into account the weight of the material.
- Polyurethane and Polystyrene Moldings: Use universal glues based on acrylic or water. They dry quickly and provide sufficient adhesion.
- Wooden Moldings: It is best to glue using PVA glue or mounting glue for wood, which guarantees the stability of the attachment.
- Special Cases: If you need to glue moldings to tiles or other smooth surfaces, pay attention to special adhesive systems that provide reliable adhesion even to nylon or ceramic coatings.
5. Step-by-Step Instructions: How to Glue Moldings
Below is a detailed instruction for those asking: how to glue moldings and how to attach moldings to different surfaces.
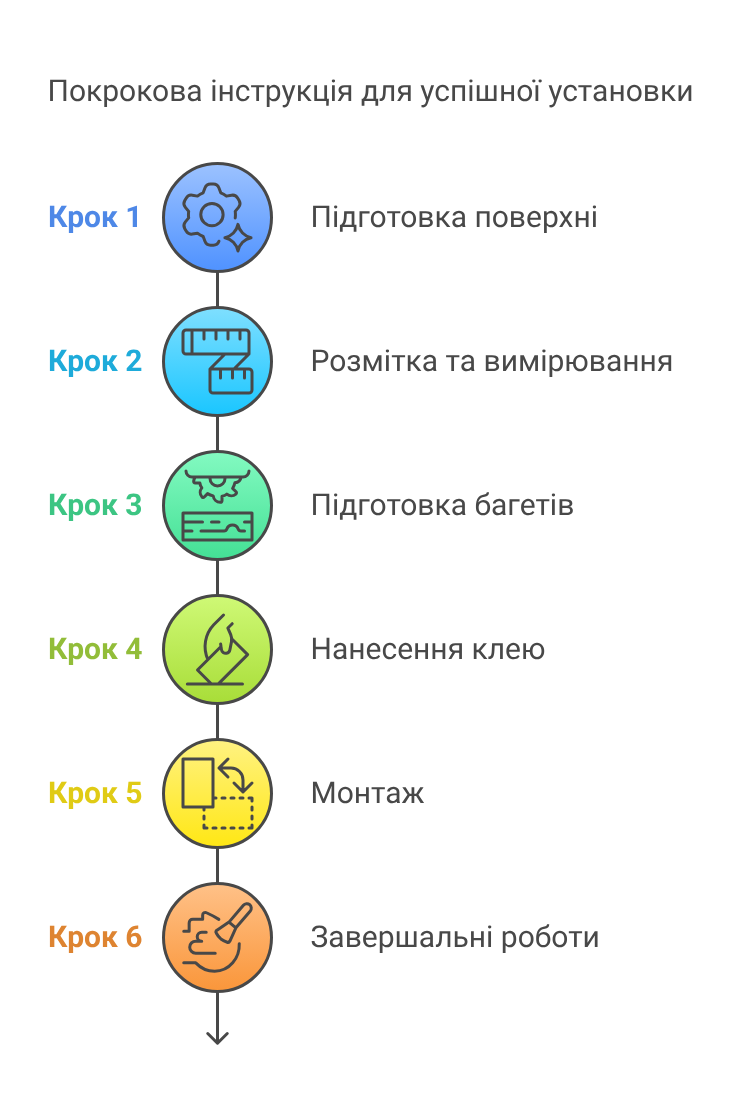
Step 1: Surface Preparation
- Cleaning: Thoroughly clean the surface of the ceiling, walls, or tiles from dust, dirt, and old coatings.
- Base Preparation: If necessary, apply primer or putty for better adhesion.
Step 2: Marking and Measuring
- Marking: Use a tape measure, square, and pencil to accurately mark the places where the moldings will be attached.
- Calculation: Measure the length of the walls and ceiling, leaving extra material for cutting and corner joints.
Step 3: Preparing the Moldings
- Cutting: Using a saw or special scissors, cut the moldings into segments of the required length. If you are working with gypsum or wooden moldings, it is important to consider the corner joints.
- Edge Treatment: If necessary, trim or sharpen the edges for a perfect joint.
Step 4: Applying Glue
- Glue Application: Using a spatula, evenly apply glue to the back of the molding. Pay attention to what to use to glue moldings – choose glue according to the material.
- Control Quantity: Do not use excessive glue to avoid overflow beyond the molding, but do not skimp either, as this affects the strength of the joint.
Step 5: Installation
- Gluing: Carefully apply the molding to the marked surface, pressing it evenly. If you are wondering how to glue moldings to a wall or how to attach moldings to a ceiling, it is important to follow the exact markings.
- Fixation: Use a level or laser measurer to check for horizontal and vertical alignment. In some cases, temporary fastening may be required using special brackets or clamps.
Step 6: Finishing Touches
- Sealing Joints: After installing the moldings, fill the joints with sealant or a special mixture to give a finished look.
- Final Treatment: If necessary, perform painting or varnishing to match the color of the moldings with the overall design of the room.
6. Features of Installing Moldings on Different Surfaces
6.1 How to Glue Moldings to the Ceiling
- Tips: Before installation, check the evenness of the ceiling. Use a laser level for accurate marking. Pay special attention to corner joints – they should be perfect for a flawless appearance.
- When to Glue: It is best to glue moldings after completing the main renovation work (painting, puttying) to avoid disturbing the fresh finishing layer.
6.2 How to Glue Moldings to the Wall
- Tips: Wall surfaces should be even and clean. If the walls have irregularities, they need to be leveled beforehand using putty.
- Features: When working with wooden or gypsum moldings, follow the manufacturer’s instructions for glue to ensure a strong connection.
6.3 How to Glue Moldings to Tiles
- Tips: For tiles, use special glues that provide reliable attachment to smooth and ceramic surfaces. Before installation, treat the tile with a special primer.
- Importance: Surface preparation is key – without it, even the highest quality glue will not provide the necessary adhesion.
7. Additional Tips and Recommendations
- Work Planning: Always plan your work in advance, measure the area, and calculate the necessary amount of material.
- Glue Testing: Before the main work, conduct a test gluing of a small sample to ensure the compatibility of the glue with the molding material.
- Surface Protection: Use painter’s tape to protect adjacent surfaces from excess glue.
- Temperature Conditions: Avoid gluing in high or low temperatures, as this can affect the drying process of the glue.
- Safety: Work in a well-ventilated area and use eye and hand protection.
8. Conclusion
Installing moldings is a process that requires careful preparation, the right choice of materials and tools. Answering the questions what to use to glue moldings, what to glue moldings to, and how to properly glue moldings, we hope this guide will help you achieve the perfect result in interior design. Whether you choose gypsum, polyurethane, polystyrene, or wooden moldings, following the installation technology and using quality materials will ensure the durability and aesthetic appeal of your renovation.
With this detailed guide, you will be able to independently carry out the installation of moldings, regardless of the type of surface – whether it is a ceiling, wall, or even tile. Remember that the correct choice of glue and tools plays a key role in achieving a flawless appearance in the interior.
If you have additional questions or need advice on how to glue moldings to the ceiling or how to attach moldings to other surfaces, do not hesitate to seek professional help.
This guide will help you optimize your work, make the installation process as simple as possible, and ensure a durable and aesthetic result. Successful renovations!