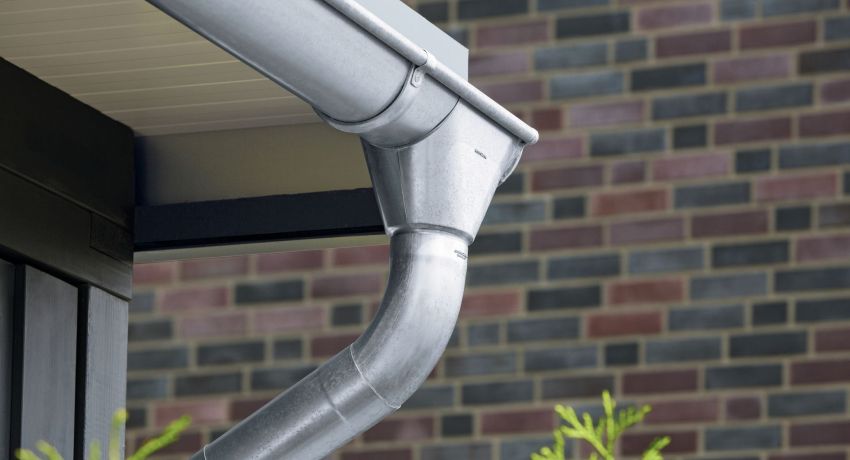
In 2025, rainwater collection systems become particularly relevant due to climate change and increasing precipitation intensity. Galvanized gutters remain a popular choice due to their strength, durability, and corrosion resistance. At the same time, with the emergence of modern materials and new installation standards, it is important to know all the nuances of installing and connecting gutters. Below is a step-by-step guide to help you install a reliable rainwater drainage system.
Useful Videos on the Topic
1. Preparation of Materials and Tools
Before starting work, make sure you have all the necessary materials and tools:
-
Materials:
- Galvanized gutters (possibly with an additional polymer coating for increased durability)
- Modern type brackets (with anti-slip coating, optimized for 2025)
- Special couplings, clamps, or connecting elements (with sealing capability)
- Drainage channels and accessories (may be equipped with clog protection systems)
- Modern sealants or silicone sealants for additional waterproofing
-
Tools:
- Tape measure and level for accurate measurement and installation
- Marker or chalk for marking
- Drill with screw or anchor attachments
- Screwdriver, hammer, and other basic tools
- Laser level (if possible, to increase installation accuracy)
2. Preparatory Work
2.1. Site Analysis and Roof Inspection
- Assessment of Roof Condition: Before installing gutters, ensure that the roof and drainage system are in proper condition. If the roof needs repairs, address this in advance.
- Choosing the Optimal Location: Gutters should be installed at an angle that allows for quick water runoff. Choose a direction that will direct rainwater away from the building’s foundation.
2.2. Planning the Layout
- Determining Mounting Points: Based on roof measurements, mark the locations for bracket installation. It is recommended to space them evenly every 1.5–2 meters to ensure gutter stability.
- Establishing the Required Slope: Ensure the gutter has a slope (minimum 2–3°) for optimal water drainage. Using a laser level will help accurately determine the slope angle.
3. Gutter Installation
Step 1: Measurement and Marking
- Measuring Dimensions: Determine the length, width, and height of each gutter segment. Check that all parts meet the plan and technical requirements.
- Marking Mounting Locations: Use a marker or chalk to mark the locations where brackets will be installed. Ensure that the marks are even and correspond to the specified slope.
Step 2: Installing Brackets
- Mounting Brackets: Secure the brackets using screws or anchors recommended by the manufacturer. Use a level to check their placement.
- Level Check: Ensure that all brackets are at the same height, which guarantees proper gutter installation.
Step 3: Installing Galvanized Gutters
- Starting the Installation: Begin at the lower edge of the roof and gradually move up to the top. This will help avoid mistakes when connecting segments.
- Connecting Segments: Use special couplings or clamps to connect the gutters. In 2025, popular connecting elements with pre-applied sealant emerged, providing a tight connection and preventing leaks.
- Checking for Leaks: After connecting, carefully check all joints. If necessary, apply additional silicone sealant to enhance waterproofing.
Step 4: Installing the Downspout
- Securing the Downspout: Attach the downspout to the end segment of the gutter, ensuring it has the correct slope away from the building.
- Additional Accessories: Optionally, you can install additional filters or screens to prevent the gutter from clogging with leaves and other debris.
Step 5: Final Check and Adjustment
- Functional Testing: After completing the installation, conduct a test run of the system. Use a stream of water or a small volume of rainwater to check for leaks.
- Final Adjustments: If necessary, adjust the position of the brackets or connecting elements to ensure the system operates flawlessly.
4. Additional Recommendations and Tips
4.1. New Technologies and Materials
- Innovative Coatings: In 2025, gutters with additional polymer coatings appeared, protecting against ultraviolet radiation and aggressive atmospheric effects.
- Clog Protection Systems: Consider installing additional accessories – screens or filters that facilitate gutter maintenance and reduce the risk of blockages.
4.2. Environmental Safety and Energy Efficiency
- Using Rainwater: Equip a rainwater collection system for further use (watering the garden, washing the car, etc.). This will help reduce the consumption of tap water and conserve resources.
- Energy-Efficient Installation: Modern solutions consider not only the efficiency of water collection but also safety, so follow the manufacturers’ recommendations and local building codes.
4.3. Safety Tips
- Personal Protective Equipment: During installation, use gloves, safety glasses, and appropriate clothing to avoid injuries.
- Proper Use of Tools: Always check the condition of power tools and follow the instructions for their use.
- Professional Assistance: If you lack sufficient experience or have doubts about the installation, consult qualified specialists.
4.4. Maintenance and Prevention
- Regular System Check: Periodically inspect gutters and channels, remove debris, check the tightness of connections, and the condition of fasteners.
- Seasonal Maintenance: After heavy rainfall or before the snow season, perform an additional inspection to timely identify and eliminate possible malfunctions.
5. Conclusion
Connecting galvanized gutters is a key step in creating a reliable rainwater collection system. Modern technologies and materials significantly enhance the efficiency and durability of the installation. Follow the provided sequence of work:
- Preparation: Choosing materials, tools, and checking the condition of the roof.
- Marking and Installing Brackets: Accuracy of measurements and proper placement of fasteners are the keys to successful installation.
- Installing Gutters and Channels: Use modern connecting elements and sealants to prevent leaks.
- Final Check: Test the system and make adjustments for optimal operation.
With the right approach, your rainwater drainage system will serve for many years, ensuring effective collection and drainage of water, as well as contributing to energy conservation and environmental safety. Successful installation!