Drywall is a popular building material in the form of sheets with a gypsum core, covered with cardboard. It is widely used for leveling walls, installing partitions and ceilings, creating niches, and other constructions. In this guide, we will explore the main types of drywall, their properties, which profile for drywall is needed, how to carry out drywall installation, as well as what the drywall price is and what it depends on. At the end – answers to frequently asked questions (FAQ) about the selection and use of drywall.
Useful videos on the topic
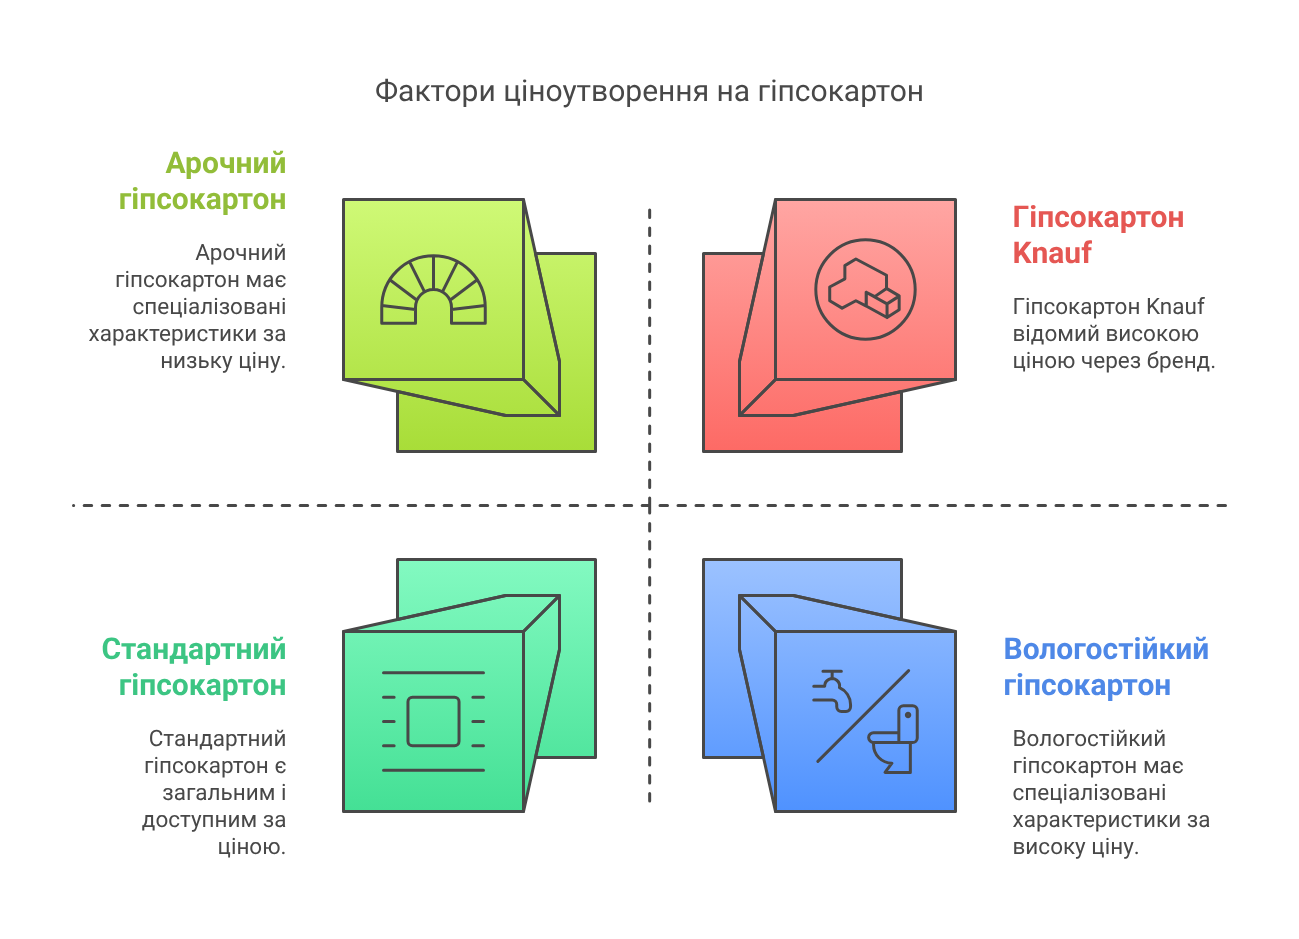
Main types of drywall
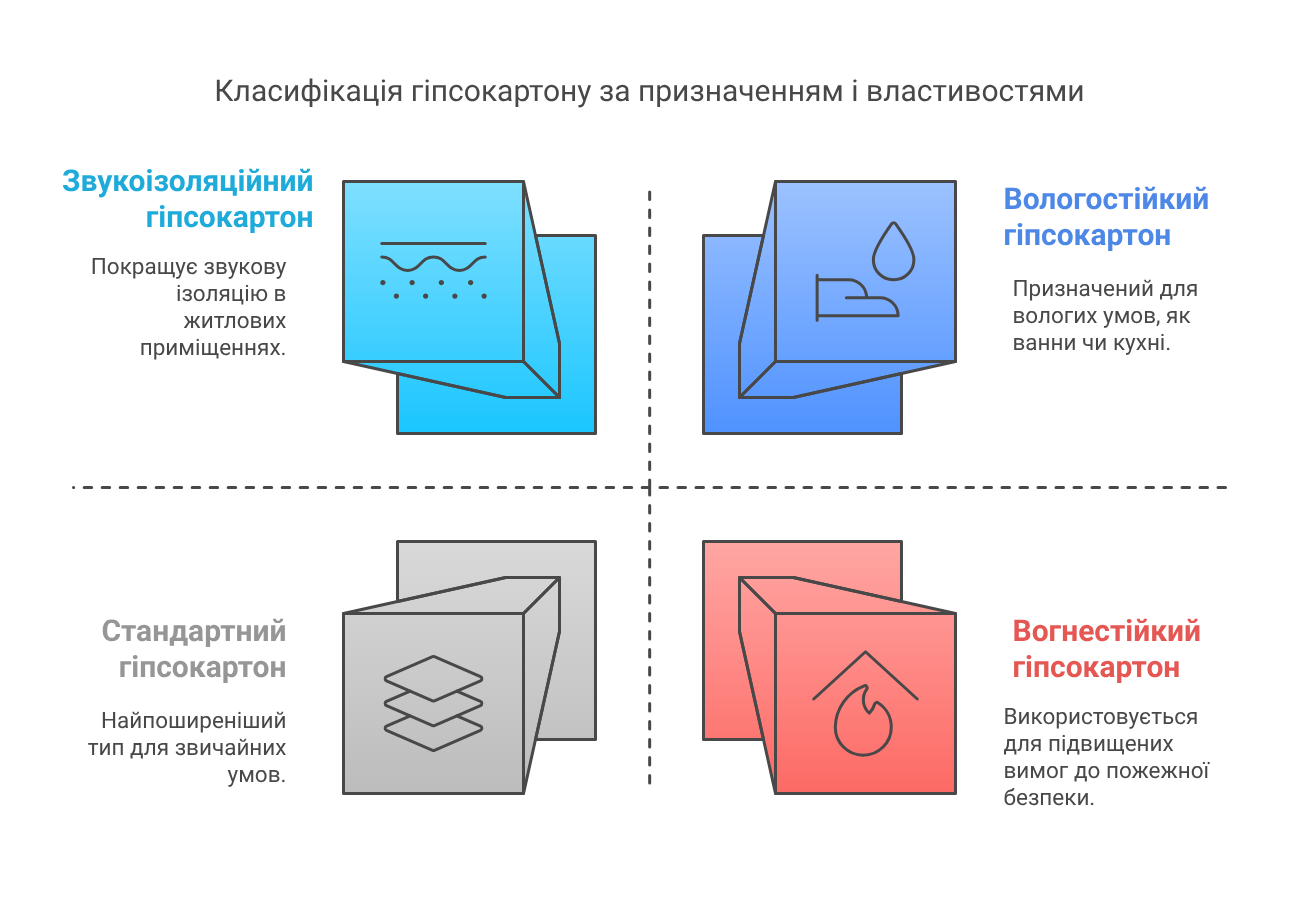
There are several types of drywall sheets (GKL), each designed for its own operating conditions. Choosing the right type will ensure the durability of the structure and the required characteristics.
-
Standard drywall (GKL) – the basic type in gray color. This is the most common and cheapest option. It is used in rooms with normal humidity (up to ~60%) for wall and ceiling cladding, installation of interior partitions, and creation of decorative structures. It does not contain additional protective additives, so it is sensitive to moisture and does not have increased fire resistance.
-
Moisture-resistant drywall (GKLV) – a material with green-colored face cardboard. Such moisture-resistant drywall contains hydrophobic additives and antifungal components that reduce water absorption and prevent mold growth. It is intended for rooms with increased humidity: bathrooms, toilets, kitchens, laundries, balconies. In humid conditions, moisture-resistant drywall does not deform and does not soak as quickly as regular drywall, although direct contact with water should still be avoided.
-
Fire-resistant drywall (GKLO) – sheets with recognizable pink or reddish cardboard. Their gypsum core contains special additives (for example, fiberglass) that slow down destruction from high temperatures. Such drywall withstands open flames longer (approximately twice as long as a regular sheet) and belongs to low-flammability materials. Fire-resistant drywall sheets are used for cladding fireplaces, chimneys, ventilation shafts, server rooms, as well as for creating partitions with increased fire safety requirements.
-
Soundproof (acoustic) drywall – special boards designed to improve sound insulation in rooms. There are two approaches: massive acoustic sheets with increased gypsum density (for example, blue Knauf Acoustic sheets), or perforated acoustic panels with holes that absorb sound. They are used in cinemas, studios, halls, as well as in residential rooms to improve sound insulation. Soundproof drywall allows reducing noise levels, but maximum effect is achieved in combination with mineral wool insulation in the frame.
-
Arch drywall – thin flexible sheets for curved structures. The thickness of arch GKL is usually 6.5 mm (compared to standard 9.5–12.5 mm). Inside the gypsum, there may be reinforcing fiberglass to increase strength when bending. Arch drywall bends easily, allowing the creation of arches, vaults, wavy ceilings, and other complex shapes without cutting into segments. It is installed in a double-layer design (two thin sheets on top of each other) to ensure sufficient rigidity of the curved structure.
-
Other special types – less common varieties of drywall with specific properties. For example, moisture-fire-resistant drywall (GKLVO) combines protection against both moisture and fire (used in restaurant kitchens, boiler rooms, etc.). Laminated drywall has a decorative coating on the front side (PVC film or another decorative layer) and is used for quick finishing without additional puttying and painting. It is also worth mentioning gypsum fiber boards (GVL) and aqua panels – these are not quite drywall, but related materials (gypsum mixed with fiber or cement base) for floors or very humid areas, but they are sometimes also considered as an alternative to drywall.
Properties and characteristics of drywall
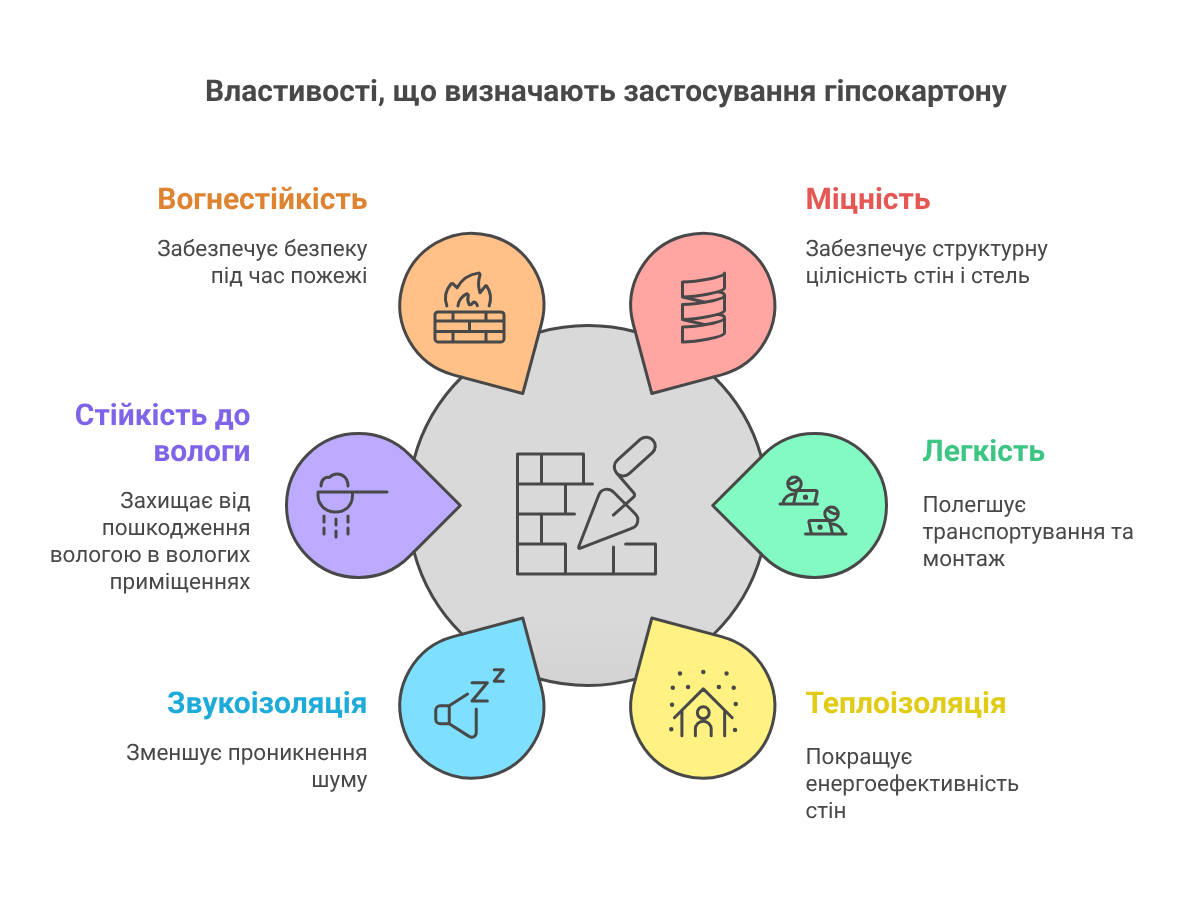
Drywall is favored by builders for its combination of ease of use and sufficient technical characteristics for interior finishing. Let’s consider the main properties of this material:
-
Strength and load capacity. Drywall sheets are strong enough to create flat walls or ceilings, but they are not designed for significant point loads. The material is quite brittle – a punch or other object can create a hole. The maximum load on a drywall wall without additional reinforcement is approximately 30 kg/m² – this is enough for shelves or a TV on a bracket, but for very heavy items (boiler, wardrobe), it is necessary to pre-install fastening blocks in the frame or use special butterfly dowels and profile UA for reinforcement. Also, drywall is not a structural material – you cannot stand on it, use it as a support, etc.
-
Light weight. GKL consists mainly of gypsum and cardboard, so it is quite light compared to brick or gypsum plaster. The weight of a standard sheet measuring 2.5×1.2 m (area 3 m²) is approximately 22–30 kg (depending on thickness and density). The small weight reduces the load on the ceilings and makes transportation and installation easier. Installation does not require lifting equipment – two workers can easily carry the sheets upstairs.
-
Thermal insulation. Drywall has low thermal conductivity (about 0.25–0.35 W/(m·K)), meaning it can improve the thermal insulation of walls in a room. Of course, in terms of thermal insulation properties, it is inferior to specialized insulation materials, but still, the layer of gypsum and the air gap between it and the main wall reduce heat loss. If mineral wool is installed between drywall sheets, very high thermal insulation of the wall or partition can be achieved.
-
Sound insulation. A drywall sheet itself moderately insulates noise (its airborne sound insulation index Rw for a partition with one layer is ~30-35 dB). However, as part of a frame-cladding structure with an air gap and, if necessary, with sound insulation filler (mineral wool), drywall provides a noticeable sound insulation effect. Double cladding (two layers of sheets on each side of the partition) significantly increases sound insulation – this achieves Rw ~50 dB and more, which is sufficient for most residential premises. For special needs, acoustic perforated GKL panels can be used, which absorb sound inside the room, reducing the echo effect.
-
Moisture absorption and moisture resistance. Regular drywall is sensitive to increased humidity: at air humidity above 60-70%, the gypsum core can absorb water, losing strength and softening. Therefore, moisture-resistant drywall (with impregnated additives) is mandatory for bathrooms, basements, and other humid areas. The water absorption of moisture-resistant sheets is approximately half that of standard ones (up to ~10% versus 20%). It is important to understand that moisture-resistant does not mean waterproof – direct contact with water (leaks, constant condensation) should be avoided or the surface should be protected with additional waterproofing. In case of wetting, the sheet must dry out; otherwise, mold may form. Properly installed and painted GKLV can serve for years in a bathroom without problems if ventilation is good.
-
Fire resistance. Drywall belongs to the group of low-flammability materials (G1) – the cardboard can catch fire, but the gypsum inside prevents the spread of fire by releasing water (crystallization moisture) when heated. Standard GKL withstands the action of flames for some time, however, fire-resistant drywall has a higher fire resistance class. With proper installation (with a metal frame), a structure made of GKLO can hold back fire for 30-60 minutes, which buys time for evacuation. Important: the joints between sheets must be carefully filled with fire-resistant putty to prevent fire from passing through them. For residential premises, ordinary sheets are often sufficient, but around fireplaces, stoves, and electrical panels, it is better to use GKLO.
-
Eco-friendliness and microclimate. Drywall is considered an environmentally safe material. It is made from natural components: gypsum rock, cardboard (cellulose), and a small amount of organic additives. Sheets do not emit harmful substances into the air, making them suitable even for children’s rooms, hospitals, etc. Gypsum has the property of regulating air humidity: it absorbs excess moisture and releases it back when the air is too dry. This helps maintain a comfortable microclimate in the room. Also, drywall does not contain nutrients for bacteria or dust mites, which positively affects home hygiene.
-
Ease of processing. Another property is ease of work. Drywall is easily cut with a regular utility knife: the cardboard is scored and then broken along the line. It is easy to drill holes in it, including for outlets or lights. The sheets bend well (especially thin arch or moistened ones), which opens up wide design possibilities. Cladding with GKL does not require “wet” processes (like plastering), so work can be done quickly and relatively cleanly.
In summary: drywall has many advantages – it is lightweight, versatile, strong enough for most interior constructions, inexpensive, and eco-friendly. Disadvantages – it does not like water, cannot withstand very heavy items without reinforcement, and requires finishing (puttying) before final decoration. Knowing these features, one can properly apply the material and achieve a durable result.
Profile for drywall: types and selection
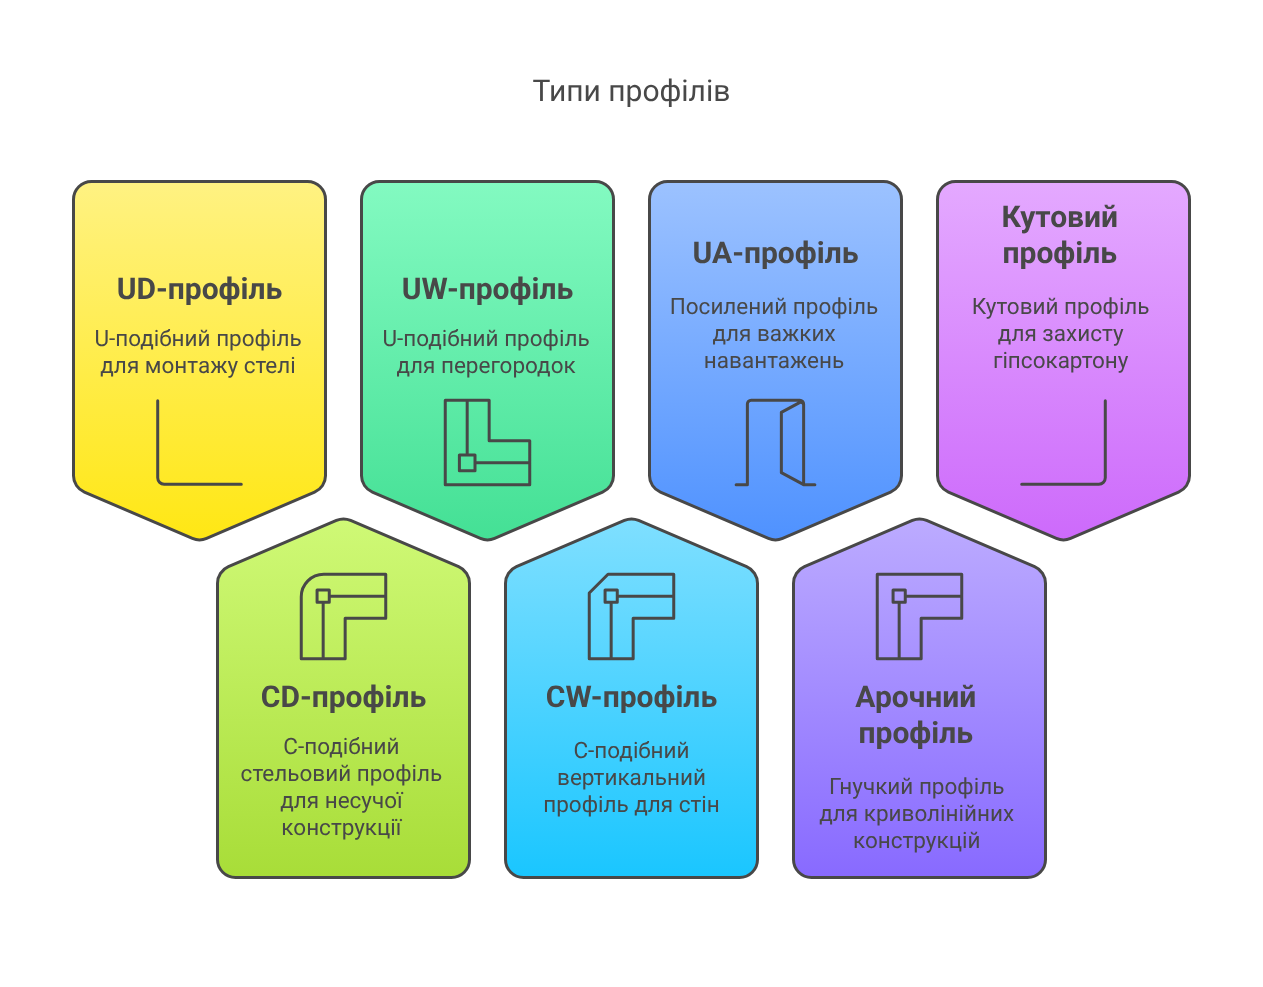
For drywall installation, a special metal profile is used – galvanized steel elements from which the frame is assembled. Choosing the right profile for the drywall structure is no less important than choosing the type of GKL, as the frame determines the strength and geometry of the walls or ceiling. There are different types of profiles for drywall, each with its purpose:
-
UD-profile (ceiling guide) – U-shaped profile with a shelf width of ~27 mm. It is used as a guide rail around the perimeter of the room when installing a suspended ceiling or wall cladding. It is fixed with dowels to the walls (or to the floor/ceiling when serving as a guide for a small partition). Ceiling CD profiles are inserted into the UD profile. The installation of the ceiling frame begins with leveling the UD around the perimeter of the room.
-
CD-profile (ceiling load-bearing) – C-shaped ceiling profile, the main element of the frame for a suspended ceiling or wall cladding. The standard size is 60×27 mm in cross-section. CD profiles are inserted into UD profiles and fixed to the ceiling using hangers (direct or spring hangers with pins). They bear the weight of the drywall sheets. For rigidity, many manufacturers make longitudinal ribs of rigidity on the back of the CD profile. The installation step of CD (the distance between adjacent profiles) is usually 60 cm for the ceiling.
-
UW-profile (guide for partitions) – also a U-shaped profile, but wider (typical widths are 50, 75, or 100 mm). UW is fixed to the floor and ceiling and serves as the base for installing vertical partition studs. The height of the profile wall is ~40 mm. CW stud profiles of the corresponding size are inserted into the UW. In fact, UW is the “base” of the partition, determining its thickness and direction.
-
CW-profile (stud) – C-shaped profile that is installed vertically in pairs with UW. The width of CW corresponds to the width of UW (50, 75, 100 mm, etc.), and the shelf height is ~50 mm. It is to the CW profiles that drywall sheets are directly attached on walls and partitions. Stud profiles are arranged with a step of 40 cm (for wall cladding) or 60 cm (for partitions) from each other. Inside the CW, there are technological holes for running communications (electrical wiring, cables).
-
UA-profile (reinforced) – a special stud profile made of thicker metal (2 mm), designed for installing door openings and other places with increased loads in partitions. The UA profile has additional holes for fastening through it. It is used in pairs on either side of the door opening to prevent the structure from deforming under the weight of the doors, as well as for heavy suspended equipment (boilers, air conditioners) in frame walls.
-
Arch profile – a flexible guide profile with notches that allow it to bend along a curve. It can be convex or concave (for external or internal bends). It is used to create arches, domes, vaults, and other rounded structures. Alternatively, a standard UD profile can be cut and bent, but a factory arch profile significantly simplifies the work.
-
Corner profile – a perforated aluminum or steel corner used during the puttying stage to strengthen the external corners of drywall constructions. It is not part of the frame but is important for protecting corners from chipping and giving them a perfectly even shape. Corners are set on putty at the corners (in niches, protrusions, joints of walls) before final sanding.
Choosing a profile. When selecting a profile for a specific project, consider the type of construction and load. For ceilings, the UD+CD system is suitable (it is better to take metal with a thickness of 0.5 mm to avoid sagging). For partitions – the UW+CW system of the required width: 50 mm is sufficient for simple partitions or cladding of communications, 75 mm – if a layer of insulation is planned or better sound insulation is needed, 100 mm – for very strong partitions or laying a thick layer of insulation. Vertical studs for high partitions (>3 m) should be taken with a metal thickness of 0.6 mm to prevent sagging. If a door opening is anticipated – do not forget about UA profiles for the studs near the doors. Fixing the profile to the walls/ceiling is done with dowels (6×40 mm or similar) at a step of ~30-50 cm. Profiles are connected to each other with self-tapping screws for metal (“bugs”). A properly selected and installed profile guarantees a geometrically even and strong base for drywall.
Price of drywall: what it depends on and how much it costs
One of the most common questions is how much drywall costs. (The query “drywall price” is very popular on the internet.) The price of drywall depends on several factors:
- Type of drywall: standard is the cheapest, moisture-resistant and fire-resistant are more expensive (by 20–50%), specialized (acoustic, arch, combined) are even more expensive.
- Sheet thickness: ceiling sheets thinner than 9.5 mm are usually slightly cheaper than wall sheets 12.5 mm of the same type, as they contain less gypsum. Arch sheets 6.5 mm are often the most expensive due to the special technology.
- Sheet size: drywall is sold in standard size sheets (2.5×1.2 m or 3×1.2 m). Sometimes the price is indicated per sheet, sometimes per square meter. A larger sheet is, accordingly, more expensive, although the price per m² may be slightly more advantageous when buying large sheets.
- Brand and quality: popular brands in the Ukrainian market include Knauf, Siniat (formerly Lafarge), Rigips, etc. Knauf is traditionally slightly more expensive as brand No. 1, but the difference is small. There are also domestic manufacturers or lesser-known brands with more affordable prices, but it is worth paying attention to quality certification.
- Purchase volume: wholesale prices are lower. When buying a pallet (about 40–50 sheets) or large volumes, discounts can be obtained at building hypermarkets or warehouses.
- Additional characteristics: for example, drywall with increased hardness (like Knauf Diamant) or with a special coating will be more expensive than regular drywall of the same type.
Below is an approximate price table for different types of drywall (for one sheet of standard size ~2.5×1.2 m, thickness 12.5 mm). The prices are averaged and may vary depending on the manufacturer and region:
| Type of drywall | Approximate price, UAH/sheet (2.5×1.2 m) |
|---|---|
| Standard (GKL) | ~ 200–250 UAH |
| Moisture-resistant (GKLV) | ~ 250–300 UAH |
| Fire-resistant (GKLO) | ~ 250–320 UAH |
| Combined GKLVO | ~ 350–450 UAH |
| Acoustic (soundproof) | ~ 300–400 UAH (specialized models) |
| Arch (flexible 6.5 mm) | ~ 500–600 UAH |
Note: Prices are given as of the current time for reference. Actual costs may vary. Usually, standard drywall is the most affordable, while special types can cost 1.5-2 times more than it.
Price of profiles for drywall. When planning a budget, consider the cost of the metal frame as well. Below are approximate prices for the main profiles (standard length 3 m):
| Type of profile (length 3 m) | Purpose | Approximate price, UAH/piece |
|---|---|---|
| UD-27 guide | Perimeter of the ceiling, guide | ~ 60–80 UAH |
| CD-60 ceiling | Ceiling beams (load-bearing) | ~ 100–130 UAH |
| UW-50 guide | Guide for partitions 50 mm | ~ 80–120 UAH |
| CW-50 stud | Studs for partitions 50 mm | ~ 100–140 UAH |
| CW-100 stud | Studs for partitions 100 mm | ~ 150–200 UAH |
| UA-50 reinforced | Profile for door opening (50×50 mm, thick-walled) | ~ 250–300 UAH* |
> UA profiles are made in lengths of 3 or 4 m; due to the thick metal, the price is significantly higher than that of regular profiles.
As can be seen, the profile for drywall is a significant part of the costs. For example, for a partition frame of 3×2.5 m, several UW/CW profiles will be needed, which can cost as much as 2–3 sheets of drywall in total. Therefore, when compiling a budget, consider both components.
Where to buy drywall and profiles profitably
Stores and suppliers: Drywall is a mass product, sold in almost all building stores. For a profitable purchase, it is worth comparing prices in different places:
- Building hypermarkets – such as Epicenter, Nova Line, Leroy Merlin. They have a wide selection (various brands, types), convenient service, and you can immediately buy related materials. Prices are average in the market, sometimes there are promotions or discounts for large volumes. Plus – quality guarantee and the possibility of delivery to the site.
- Specialized building material bases – wholesale warehouses or networks like KUB, OLDI, ARS, etc. They often offer lower prices, especially when ordering from a certain amount or quantity (wholesale). They may have slightly less comfort for retail customers, but for significant savings, it is worth considering. Also, at the bases, you can immediately load large batches with machine loading.
- Online building material stores – many platforms (for example, Prom.ua, ibud.ua) allow you to find the lowest price from various sellers in your region. You can order delivery directly to the site online. Pay attention to the seller’s reputation and delivery conditions (the cost of transport services may offset savings on the product price).
- Direct dealers of manufacturers – if you need a lot of material (for example, for new construction), you can contact official dealers of Knauf, Siniat, or others. They provide a large quantity of goods from the first hand and can offer special prices. For a one-time apartment renovation, this is usually impractical; it is easier to buy at a warehouse or in a market.
Tip: before purchasing, calculate the required number of sheets and profiles. Add ~10% reserve for waste and possible defects. Check if there is free delivery for orders over a certain amount – some stores offer this service. And do not forget to purchase additional materials: hangers, profile connectors, screws for drywall (so-called “bugs” for metal and black for GKL), tape for joints, putty for seams – all of this also affects the total cost of the project.
Drywall installation: main stages
Installing drywall requires preparation, but overall the process is quite technological and quick compared to traditional plastering. Let’s consider the steps of installation:
-
Preparation and marking. First, the surfaces are cleaned of old coverings that may interfere (peeling plaster, etc.). Marking is carried out: lines are drawn on the floor, walls, and ceiling where the frame will pass (lines for UD/UW profiles). A level, laser level, and tape measure are used. It is important to mark all fastening points so that the structure comes out even.
-
Installing the frame from the profile. According to the marking, the guide profiles UD/UW are fixed around the perimeter. Next, stud profiles CW (for walls/partitions) or ceiling CD (for the ceiling) are installed with the required step. Stud profiles are fixed in the guides and can additionally be fixed to the walls using direct hangers (perforated plates). All elements of the frame are leveled: vertical ones – strictly vertical, ceiling ones – in one horizontal plane. Fastening: dowels 6×40 mm for the profile to the walls/ceiling, self-tapping screws for metal 3.5×11 mm (“bugs”) for connecting profiles to each other. At this stage, communications are also laid: electrical wiring in corrugated tubing, distribution boxes, if they will be hidden behind drywall (do not forget to drill holes for cables in the profiles or use ready-made ones).
-
Cutting and installing drywall sheets. The sheets are adjusted to the required sizes. Cutting drywall is done with a knife: the cardboard is scored on the front side with a ruler, the sheet is broken, and the cardboard is cut on the back. The edges are trimmed with a plane or knife at an angle of ~45° at the joints if they are factory straight (this is necessary for quality puttying of the joint). The finished panels are applied to the frame and screwed with screws for drywall (black phosphate-coated, 25 mm for a 12.5 mm sheet) to the profiles. The step of the screws is ~15 cm around the perimeter of the sheet and 20–25 cm in the middle. The screw is tightened with a screwdriver so that the head is slightly recessed into the plane (≈1 mm) but does not tear the cardboard. A small gap (~2–5 mm) is left between adjacent sheets – a temperature joint, which will then be filled with putty (this prevents cracks during expansion).
-
Puttying joints and preparing for finishing. After cladding, all joints between sheets and places where screws enter need to be puttied. First, the joints are taped – serpyanka (glass mesh on an adhesive base) or paper tape. This strengthens the joint and prevents cracks. Then a layer of putty is applied (for example, gypsum putty type Knauf Fugen or universal). The corners with installed corner beads and all recesses from screws are also puttied. After drying, excess material is sanded. If necessary, a second layer of putty is applied, wider, spreading it with a spatula to level the plane.
-
Finishing. The prepared drywall “rough” layer can be painted, wallpapered, or tiled – this will be detailed later in the section finishing drywall.
Typical mistakes during installation and how to avoid them:
- Mistake: Incorrect choice of drywall type or profile. How to avoid: Use moisture-resistant GKLV in humid rooms, fire-resistant GKLO near heat sources. For long partitions, use sufficiently thick profiles; for ceilings – only profiles of the recommended thickness (0.5 mm and more) to avoid sagging.
- Mistake: Saving on the number of profiles or fasteners. If the step between the studs is increased beyond the recommended or not enough hangers are installed, the structure may wobble, the drywall may sag, and cracks may appear in the putty. Solution: Strictly adhere to the step norms (no more than 60 cm between CD/CW) and place hangers every 60-80 cm along the length of the profiles.
- Mistake: Joint of sheets without a backing bar. If two drywall sheets meet on the wall without a profile underneath (for example, the sheets meet between the studs), the joint is almost guaranteed to crack. Solution: plan the placement of joints so that each joint is on a profile. If necessary, add an intermediate profile (an additional stud) or insert a wooden batten to which both edges of the sheets can be screwed.
- Mistake: Too short profile segments without proper connection. If the wall height is >3 m and profiles are extended, special profile extensions must be used or connections must overlap by at least 50 cm and be secured with several self-tapping screws. Otherwise, there will be a “weak point” at the joint.
- Mistake: Incorrect tightening of self-tapping screws. If the screw is not tightened – the head will protrude and interfere with puttying; if overtightened – it will tear the cardboard and lose fixation. Solution: Use a depth limiter on the screwdriver or carefully control each screw. In case of cardboard tearing, screw an additional screw nearby, and fill the damaged area with putty.
- Mistake: Not using tape on joints. Simply covering the joints with putty is not enough – over time, a crack will almost certainly appear along the joint line. Solution: Always tape the joints with serpyanka or paper tape; this compensates for the movement of the sheets.
- Mistake: Too long continuous planes without temperature joints. If the drywall ceiling is very large in area (over 10 m in length), temperature fluctuations may cause stress. Solution: Make deformation joints (gaps) or perform large planes with a gap, masking the joints with decorative elements.
- Mistake: Installing regular drywall in a damp room. The sheets quickly absorb moisture, sag, and become covered with mold. Solution: first dry the room, make waterproofing, use only moisture-resistant GKLV, and treat all cuts and internal cavities with an antifungal solution.
Adhering to the installation technology is the key to ensuring that the drywall structure will be even, strong, and not crack over time.
Finishing drywall (puttying, painting, covering)
After installation and basic puttying of the joints, the drywall surface requires finishing. Drywall is good in that it can be finished with almost any covering. Let’s consider the main options:
-
Puttying for painting or wallpaper. If the walls are planned to be painted or thin wallpaper is to be glued, it is advisable to putty the entire surface of the drywall with a thin layer of finishing putty. This will hide the smallest irregularities, and the joints of the sheets will become completely invisible. Finishing putty (polymer or fine-dispersed gypsum) is used. A wide layer is applied, spreading it with a spatula 30-40 cm, then sanded with fine sandpaper to smoothness. If, however, thick wallpaper or decorative plaster is planned, it is sufficient to treat only the joints and fastening places well, and full puttying may not be necessary – thick wallpaper will hide minor defects anyway.
-
Priming. Before any finishing covering, drywall should be primed. The primer penetrates the surface of the cardboard and putty, strengthening it and reducing moisture absorption. This ensures better adhesion of paint or glue and uniform drying. Priming can be done with a roller or brush, in a solid layer without gaps, but also without running. Universal acrylic deep-penetrating primers are suitable for drywall.
-
Painting. On the puttied and primed surface, paint can be applied. Most often, water-dispersible paints (acrylic, latex) are used for interiors. They adhere well to drywall. If it is a bathroom or kitchen – choose moisture-resistant paint (usually marked for kitchens and bathrooms, containing additives against mold). Painting should be done in at least 2 layers with a roller to avoid transparency. Each layer should dry well. It is advisable to perfectly level drywall walls before painting, as gloss or even matte paint can reveal irregularities under side lighting. Painting drywall ceilings is also a popular solution; the technology is the same.
-
Wallpapering. GKL for wallpaper also needs preparation: it should be primed and, if necessary, puttied. Some craftsmen recommend applying a thin layer of PVA glue or primer with glue on the drywall before wallpapering, so that later the wallpaper can be removed more easily (this way, the cardboard will not tear off with the old wallpaper). Wallpaper is glued to drywall in the usual way. It is important that the joints of the sheets are well puttied – otherwise, through thin wallpaper, the joint mesh may show through, or they may appear as bumps/cracks.
-
Tiling. In bathrooms, moisture-resistant drywall is often used as a base for ceramic tiles. In this case, finishing puttying is not needed – on the contrary, it is better to prime the cardboard with a special primer for absorbent bases and apply tile glue directly to the sheet. Tile weight: a standard GKLV wall can withstand tiling with medium-sized tiles (up to 30×30 cm) provided that the glue is of good quality and the profile under the sheet is installed with a step of no more than 40 cm. Tiling with large format or heavy tiles (for example, porcelain stoneware 60×60) on drywall is risky – a double layer of GKLV or a stronger base (cement board) may be required. It is recommended to place the joints between the tiles not where the sheet joints are, so that the load is evenly distributed.
-
Decorative plaster, painting with effects. The drywall base is excellent for decorative plasters (Venetian, structural “bug” etc.). In this case, after puttying the joints, the entire surface is covered with a thin layer of starter putty or primed with quartz sand (to create roughness). Then the decorative coating is applied according to the instructions. Plaster paintings, panels, textured paints – all of this can be realized on drywall walls without problems.
Durability and care. Well-installed and finished drywall can last for decades. To keep the finishing looking new for a long time, follow these simple care rules:
- Avoid prolonged dampness. Ventilate the bathroom after using the shower, eliminate leaks, and do not wash drywall walls with large amounts of water. For washing painted surfaces, use a slightly damp sponge, without abrasives.
- Protect the walls from strong impacts with sharp or hard objects – drywall can be punctured by a point impact. If a dent or hole does appear, it can be repaired: cut out the damaged area to the middle of the span between profiles and insert a patch of new drywall on blocks, then putty and paint.
- The joints of drywall may give micro-cracks due to building settlement or vibrations. If cracks appear over time in the putty at the joints – they should be widened (slightly expanded), taped, and re-puttied.
- Painted surfaces are recommended to be refreshed with a layer of paint every 5-7 years (especially ceilings, which may yellow over time). Wallpaper – re-glue as needed. The cardboard and gypsum do not deteriorate if protected by finishing.
- In places where dowels are installed (for fastening shelves, pictures), holes remain upon dismantling – they can be easily filled with putty and painted over.
With proper installation and careful operation, the drywall structure will be strong and beautiful for many years. It is also repairable: almost any damage can be locally fixed without replacing the entire wall.
FAQ (Frequently asked questions about drywall)
How to choose moisture-resistant drywall?
Moisture-resistant drywall is chosen for rooms where the humidity level is elevated (bathroom, kitchen, basement). First of all, make sure that the sheet has the marking “GKLV” or green coloring of the cardboard. Choose the thickness depending on the application: for walls and partitions, 12.5 mm is better, for ceilings, a thinner moisture-resistant 9.5 mm can be taken (to reduce weight). Pay attention to the manufacturer – buy products from well-known brands (Knauf, Siniat, etc.) or verified suppliers to ensure that the moisture-resistant properties match the claims. If the room is very humid (sauna, laundry) – consider an alternative in the form of cement boards (for example, Knauf Aqua Panel), which are completely waterproof. But for most household situations, quality GKLV is sufficient. Also, keep in mind that moisture-resistant drywall is heavier and slightly more expensive than regular drywall, so use it only where needed, not throughout the apartment.
Can standard drywall be used in a bathroom?
It is advisable not to use regular (gray) drywall in bathrooms, toilets, or other humid areas. In a damp environment, standard sheets quickly absorb moisture: the cardboard softens, the gypsum loses strength, and mold may begin to develop. Even if such a wall is clad with tiles, the drywall inside without protection may swell. For bathrooms, always choose moisture-resistant GKLV – it is specifically designed for such conditions. If for some reason you have to use regular GKL (for example, minor repairs, and nothing else is at hand), then it is necessary to protect it as much as possible: apply waterproofing primer or paint over the entire surface and ventilate the room especially well. But this is a temporary solution. The correct approach is to use green moisture-resistant drywall for all areas where splashes or high humidity are possible.
What is the difference between moisture-resistant and fire-resistant drywall?
The main difference is in purpose and composition: moisture-resistant drywall has antifungal and hydrophobic additives that reduce moisture absorption. It is intended for humid conditions. Its cardboard is usually green, and the marking contains the letter “V” (GKLV). Fire-resistant drywall contains reinforcing fibers (fiberglass) and special substances that release water when heated, thereby slowing down the spread of fire. Fire-resistant sheets withstand high temperatures longer without breaking. The cardboard in them is pink or red, marked “O” (GKLO). Thus, moisture-resistant does not burn better than regular, and fire-resistant is not more moisture-resistant than regular – each type solves its task. There are also combined sheets (GKLVO) – they are both moisture- and fire-resistant at the same time, but their price is higher, and they are used where both protections are needed (for example, restaurant kitchen walls, where there is both steam and stoves).
How much does it cost to install drywall constructions?
The cost of drywall installation consists of the price of materials and payment for the work of craftsmen (if you are not doing everything yourself). The price of materials depends on the area and type of construction – you can calculate this using the tables above. As for labor: rates vary in different regions. Usually, the installation of simple partitions or wall cladding costs from 150 to 300 UAH per m² of surface area (this may include basic puttying). Ceiling installation is slightly more expensive, ~200–350 UAH/m², because the work is more complex (under the ceiling, on hangers). If the construction is complex (multi-level ceiling, curved elements, niches, lighting) – craftsmen may charge not only per square meter but also separately for complexity, plus for each box, niche, etc. Installing doors in the partition is charged separately. On average, a full cycle (frame + cladding + puttying joints) of a standard flat wall of drywall will cost about 250 UAH/m² for labor. Thus, a 3×3 m room clad with drywall may cost around 9–10 thousand UAH for labor. You can save by doing part of the work yourself (for example, dismantling the old covering, priming, cleaning) or negotiating a wholesale price for a large volume. We recommend inviting experienced specialists, as redoing incorrectly installed GKL will be more expensive.
How to properly choose a profile for drywall installation?
The choice of profile depends on the construction you plan to build. Here are some tips:
- For suspended ceilings or wall cladding on a frame, choose the UD + CD system. That is, the guide UD 27 around the perimeter and ceiling CD 60 as the main beams. Make sure that the metal thickness is at least 0.5 mm (thinner profiles hold shape worse). If the ceiling has several levels or heavy fixtures – it is better to use a profile of 0.6 mm and a more frequent step of hangers.
- For partitions, you need UW + CW profiles. Choose the width depending on the required thickness of the wall: 50 mm (if there will be no special loads, just to divide the space), 75 mm – for communications or sound insulation, 100 mm – for a very strong partition or a thick layer of insulation/sound insulation inside. UW (guide) lies on the floor and ceiling, CW (stud) is inserted vertically into it. The thickness of the metal depends on the height of the partition: up to 3 m, 0.5 mm is sufficient; 3-4 m – it is better to use 0.6 mm or additional reinforcements.
- If there will be doors in the partition – be sure to take UA profiles for the door opening. This ensures that the wall does not “move” when the doors are opened. Choose the UA profile according to the width of CW (for example, for a 75 mm wall – UA-75). It usually comes with special fastening plates.
- Fastening the profile: do not skimp on hangers and dowels. Use original accessories (hangers, connectors) for the chosen profile. Dowels for fastening to walls – expansion plastic 6×40 or metal anchor wedges, depending on the base material.
- Manufacturer of the profile: it is advisable to take from well-known manufacturers (for example, Knauf, Wallfort, Gyproc), as their geometry and metal thickness are stable. An overly cheap profile may have thin steel that bends under hand pressure. Check for bending – a quality profile is elastic and holds its shape.
- Special cases: for curved constructions, purchase a arch profile – it is easier to create a smooth radius with it. For external corners, stock up on perforated corners (they are inexpensive but very necessary during puttying).
Thus, the rule is: the profile for drywall is selected according to the task – ceiling or wall, what height/length, whether there are doors, whether curvature is needed. A properly selected profile will ensure the rigidity and durability of the structure; do not skimp on it.
We hope this guide helps you navigate the world of drywall – from choosing the right type of sheet and profile to the nuances of installation and finishing. Wishing you a successful renovation!