Painting the ceiling with water-based paint is one of the most popular ways to refresh the interior of an apartment or house. Water-based paint has no sharp odor, dries quickly, is environmentally safe, and has good coverage. In this article, we will discuss how to properly prepare the ceiling for painting, which paint to choose, how to paint the ceiling with a roller without streaks, and we will also clarify the approximate cost of painting the ceiling with water-based paint. We will also touch on aspects related to painting walls and provide useful tips to achieve a quality result.
Useful videos on the topic that I recommend watching
1. Advantages of water-based paint
-
Eco-friendliness
Water-based paints practically do not emit harmful substances, making them safe for health and the environment. -
No sharp odor
When painting with water-based paint, there is practically no unpleasant smell. After drying, the room is immediately suitable for use. -
Quick drying
Typically, the drying time for one coat of water-based paint is 2–4 hours, provided the recommended temperature (around +20 °C) is maintained. -
Variety of colors
You can choose ready-made shades or order paint tinting to your taste. Most manufacturers offer a wide range of colors. -
Good coverage
Water-based paints easily adhere to surfaces, and usually, two coats are sufficient to achieve an even finish.
2. Types of water-based paints
When choosing paint for the ceiling, pay attention to its type:
-
Acrylic
The most popular due to its elasticity, abrasion resistance, and long service life. It has good coverage, which is important for ceilings. -
Vinyl
Also provides an even and aesthetic finish. Vinyl paints are somewhat more expensive but have excellent wash resistance and maintain color saturation. -
Silicate
Perfect for mineral surfaces (concrete, brick, plaster). Provides high vapor permeability but is more expensive and requires special application conditions.
Choosing color and gloss level
- Color. Light tones visually enlarge the room, making it brighter. Dark colors add coziness but visually reduce space.
- Gloss level. Matte paints better hide ceiling defects, while glossy ones reflect light and can highlight unevenness. Semi-matte options are the “golden mean” between luxurious shine and practicality.
3. How to prepare the ceiling for painting
Proper ceiling preparation is key to a successful result. If you are interested not only in how to paint the ceiling but also how to prepare the ceiling for painting, follow these steps:
-
Protecting furniture and the floor
- Remove furniture from the room or cover it with plastic (or sheets).
- Cover the floor with construction film, cardboard, or newspapers to avoid stains.
-
Cleaning and leveling the surface
- Remove dust and dirt from the ceiling using a brush, vacuum cleaner, or damp sponge (after drying).
- If there is old paint that is peeling, wallpaper, or whitewash on the ceiling, they need to be removed with a spatula and the remnants washed off.
- Seal cracks and joints with putty, and sand after drying with fine sandpaper.
-
Priming
- Apply a primer that corresponds to the type of water-based paint chosen (usually universal acrylic primers).
- This will improve the adhesion of the paint to the ceiling and reduce its consumption.
Remember: the smoother and cleaner the surface, the better the paint will adhere and the longer the coating will last.
4. Necessary tools and materials
For painting the ceiling with water-based paint, you usually need:
- Roller (with a long or telescopic handle) with medium or soft pile for even paint distribution.
- Tray (paint tray) for rolling the roller and removing excess paint.
- Brushes for painting corners and hard-to-reach places.
- Spatula for removing old coatings and leveling.
- Sandpaper for sanding putty.
- Primer of the appropriate type.
- Painter’s tape to protect baseboards, walls, or decorative elements.
5. Technique for painting the ceiling with water-based paint
5.1 Mixing and diluting paint
- Before starting work, be sure to mix the paint to ensure it is homogeneous.
- If the paint seems too thick, add a little water according to the manufacturer’s instructions (usually up to 5-10%).
5.2 Painting corners and hard-to-reach places
- First, use a brush to treat the corners and areas that are hard to reach with a roller: the junction of the ceiling with the walls, areas near chandeliers, around pipes, etc.
- Dip the brush into the paint no more than one-third of the length of the pile to prevent excess paint and drips.
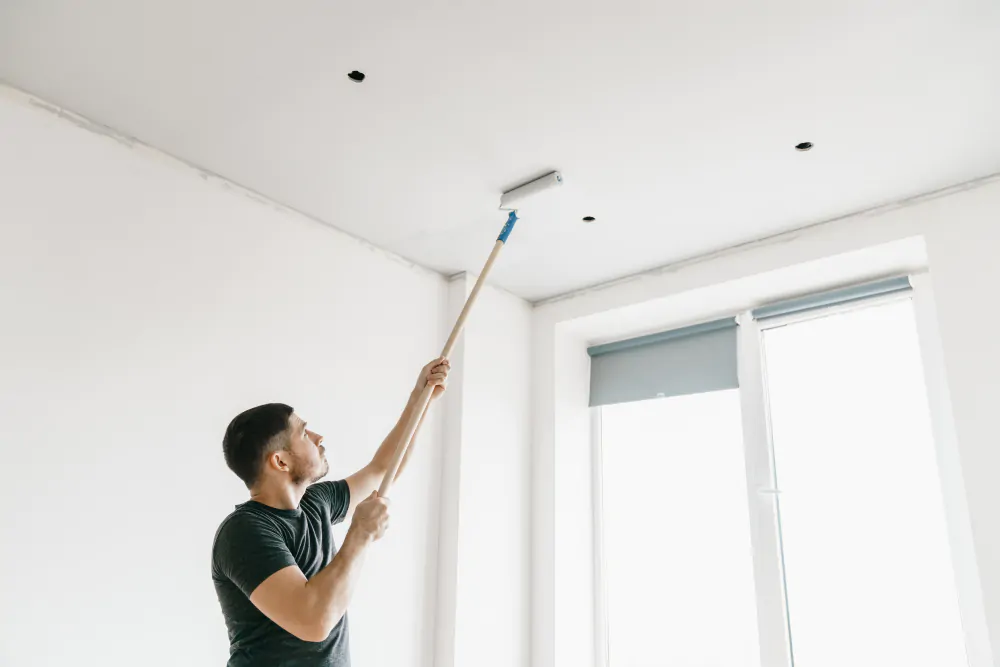
5.3 Main painting with a roller
- Pour the paint into the paint tray.
- Dip the roller into the paint and roll it several times on the textured surface of the tray to remove excess paint.
- Apply the paint to the ceiling starting from the corner of the room, gradually moving in parallel strips.
- Each subsequent strip should overlap slightly (5–10 cm) with the previous one to avoid uneven seams.
- The movements of the roller should be confident, not too fast, with medium pressure to ensure even application of paint.
5.4 Second coat of paint
- Allow the first coat to completely dry (2–4 hours, depending on the manufacturer and room temperature).
- For a perfect result, apply a second coat using the same technique, but paint perpendicular to the direction of the first coat (or vice versa). This will make the coverage more uniform.
Tip: If you notice small defects or “misses” after drying, you can carefully touch up these areas with a small amount of paint.
6. Useful tips for a perfect result
-
Work in good lighting
It is best to paint during the day or under bright artificial light to immediately see unevenly covered areas. -
Optimal temperature and humidity
The recommended temperature is from +10 °C to +25 °C. Avoid excessive humidity and drafts to ensure even drying of the paint. -
Do not interrupt work
You should paint the ceiling in one go, without taking long breaks. If the paint starts to dry and you add a new batch, noticeable streaks may form. -
Use a roller with soft or medium pile
This will help distribute the paint evenly and reduce the risk of streaks or “fuzz” on the ceiling. -
Painting “wet on wet”
It is better to apply paint “butt to butt” on still damp areas. This way, seams will not be noticeable.
7. Painting walls with water-based paint: similarities and differences
Many are also interested in how to paint walls with water-based paint. In general, the technique is very similar:
- The same set of tools (roller, brushes, tray).
- The same sequence of actions: surface preparation (puttying, priming), applying the first coat, waiting for drying, second coat.
Differences may only be that walls may have more decorative elements (switches, sockets, baseboards). They need to be protected with painter’s tape or removed if possible. Otherwise, the principle is identical.
8. Approximate cost of painting the ceiling with water-based paint
If you plan to hire professionals, painting the ceiling with water-based paint is usually priced per 1 m². The price is influenced by:
- Surface area and ceiling height.
- Complexity of preparatory work (puttying, leveling).
- Type of paint and its cost.
- Region and skill level of the craftsmen.
Approximately the cost of work can start from 70–100 UAH/m² and reach 150–200 UAH/m² in large cities or with complex relief. If additional puttying or priming of the surface is needed, the price will increase.
Tip: Compare offers from several craftsmen or companies, inquire about examples of their work and customer reviews.
9. Common mistakes when painting the ceiling
-
Poor cleaning and improper surface preparation
Dust, dirt, or old paint residues can cause poor adhesion of the new paint to the surface. -
Applying too thick a layer
This leads to streaks and drips. It is better to apply two thin layers than one very thick one. -
Uneven paint distribution
If the paint is poorly rolled on the roller or the pace of work changes too quickly, darker or lighter stripes may remain. -
Haste between layers
If you do not wait for the first coat to fully dry, the second may apply unevenly and lead to peeling. -
Incorrect temperature and humidity
Ensure normal conditions (do not work in extreme heat or low temperatures). Avoid excessive drafts.
10. Conclusion
Knowing how to paint the ceiling with water-based paint and following recommendations for preparation, material selection, and proper application technique, you can easily and quickly refresh the interior of your home or apartment. Do not forget the importance of thorough surface preparation, proper paint selection, and adherence to painting technology – this is the key to the durability and perfect appearance of your ceiling.
If you plan to entrust painting the ceiling with water-based paint to professionals, be sure to discuss the cost of work, the list of services, and deadlines to achieve a truly quality result that will last long.
Remember: the ceiling is the first thing the eye sees when we enter a room. So, well-painted, it will become the foundation of comfort and coziness in your home. Good luck with your work!